





 Sign in
 Blog
Blog
 Gift Certificates
 Contact Us
EZGO RXV Lithium Battery Replacement (Factory Samsung Gen-1)
Posted by Alex Sturwold on Jul 14, 2026
How to Replace Your Gen 1 RXV ELiTE Samsung Battery
If your EZGO RXV ELiTE was one of the first factory lithium carts on the block, then this is the article for you. For a good long while, that black Samsung SDI Lithium Battery pack under your cart's seat did its job just fine. But here we are. She's dead. OR, she's alive but the range isn’t what it used to be, the cart takes a bit longer on the charger than it should, and you’re starting to wonder what the fix is gonna cost you. Good news, you found the best article possible before you buy. Because your cart is about to get an UPGRADE (more range, more power, more battery features) for about $1,000 less than what a replacement Samsung battery would cost you.
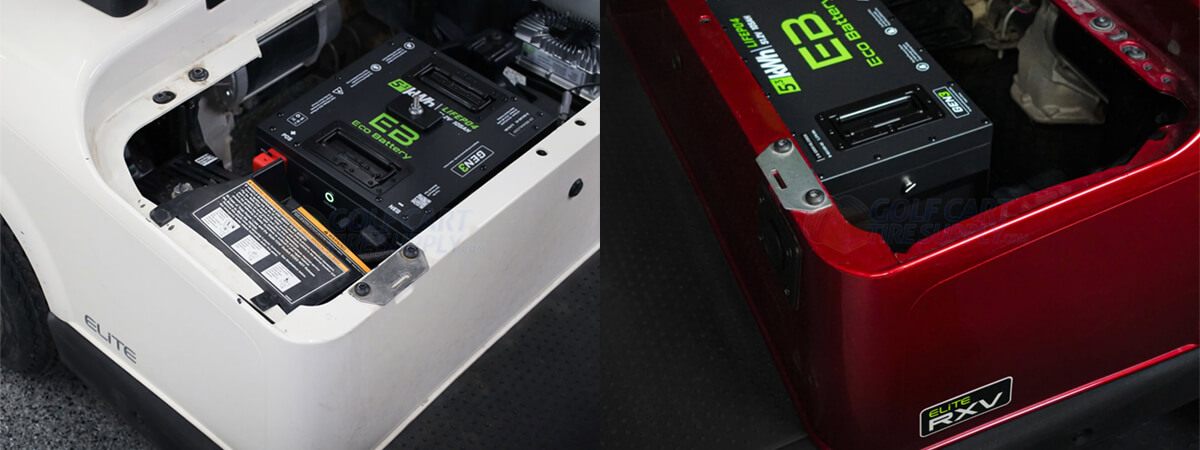
We’ve been helping RXV owners get off tired factory packs since these ELiTE carts first showed up, and the number one thing we hear after the swap is the same thing the lead-acid crowd tells us: “I should’ve done this sooner.” Swapping your Samsung SDI system for a quality aftermarket lithium kit isn’t a lateral move back to stock. A good EZGO RXV lithium battery replacement is a real step up. More range, a smarter battery, and a warranty that will likely outlive the cart itself. And all the Factory EZGO RXV ELiTE conversion kits we sell drop right into the tray your RXV already has, easily.
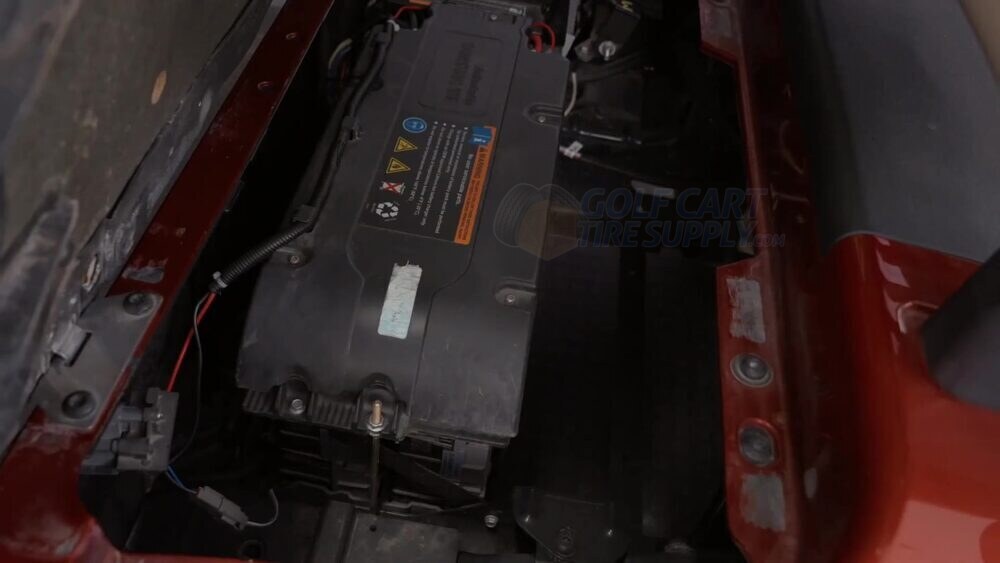
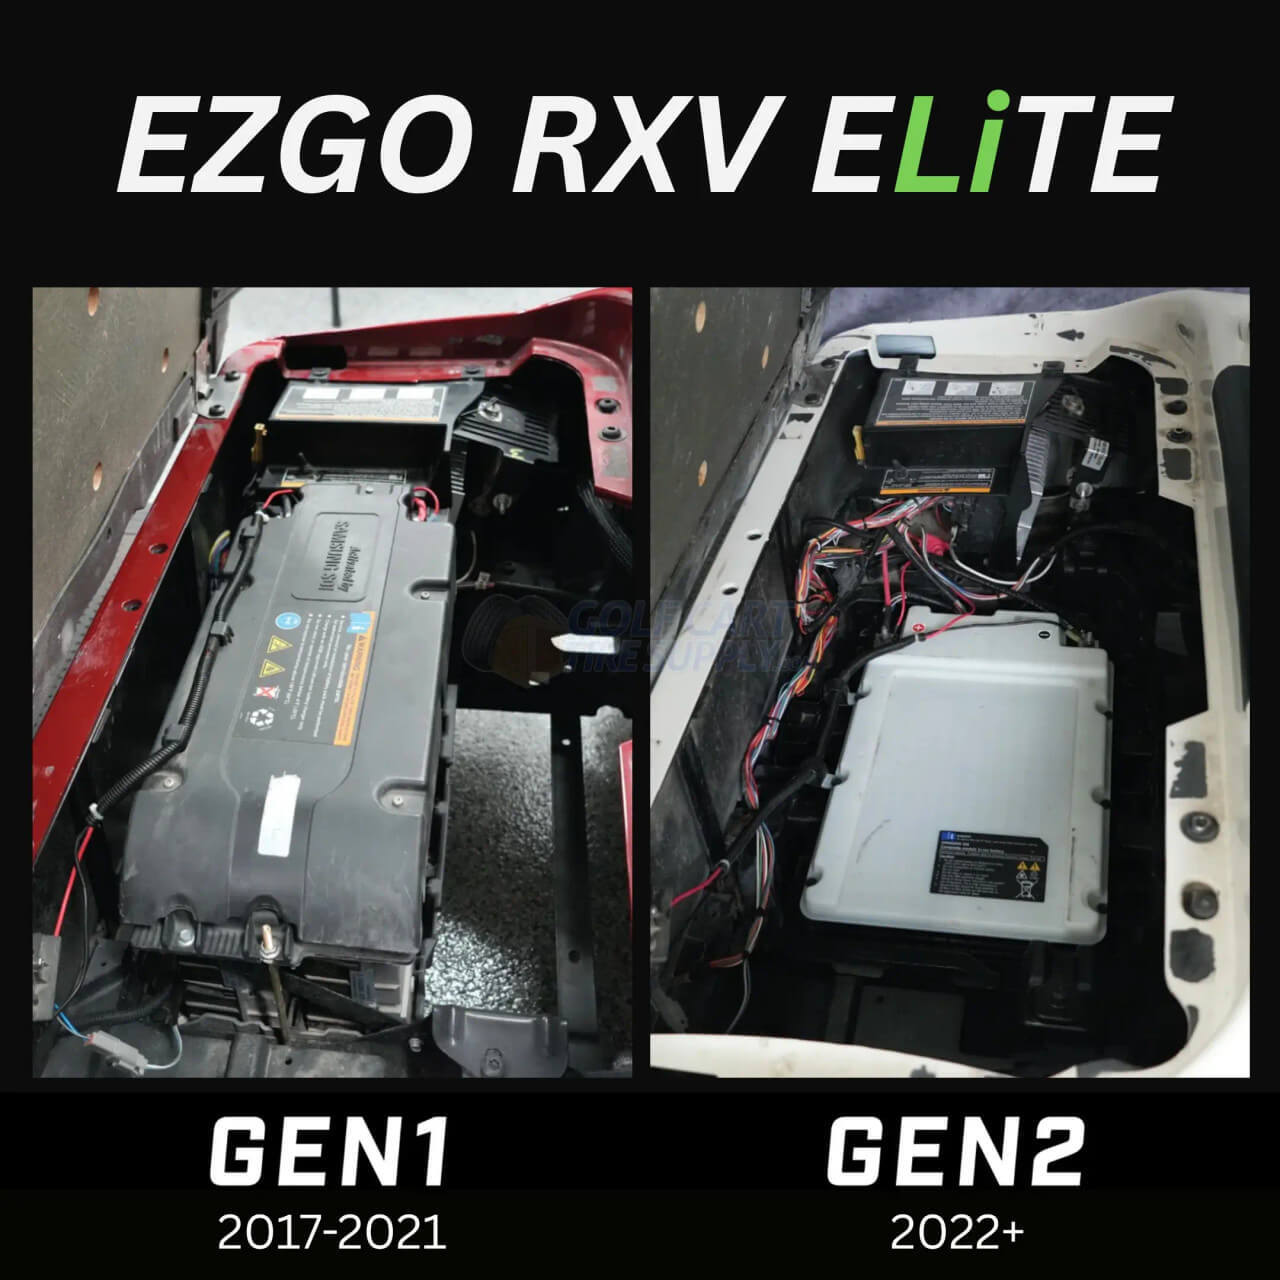
Quick check to make sure you're in the right place: this guide is for Gen 1 RXV ELiTE carts, the ones with the BLACK Samsung battery (the 2017 to 2021 model years). Lift your seat and take a look at yours now. Black pack, you’re in the right spot. If you’ve got the WHITE Samsung SDi battery, that’s a Gen-2 and you’ll want our RXV Gen-2 Replacement guide instead, because a couple of these steps are different and we don’t want you ordering the wrong kit, or worse, getting halfway done with an install before you find out.
5 Reasons to Replace Your Samsung Battery With a Quality Aftermarket Brand
You already have a lithium cart, so you know how great they are. So for once, we get to save having to walk you through the whole “Lithium versus Lead-acid” benefits list (thankfully!). What actually matters here is why you would drop in an upgraded aftermarket pack (from a brand like ECO Battery or BOLT) over letting your EZGO dealer sell you the same old Samsung pack at a premium. Here’s the honest rundown (because Samsung does make great products in general).
1. Upgraded Aftermarket Batteries Give You More Than Your Cart Started With
The RXV ELiTE comes with a 60Ah Samsung SDi pack that was built for charge-range that felt great back in 2018 (about 20 miles per charge).
In comparison, a good aftermarket 105Ah pack will get you a real 30 to 45 miles on a full charge, and the power comes quicker than your factory battery's ever did (those instant bursts everyone loves). And if you've got an upgraded controller and/or electric motor, or a sound system and lights, the upgraded battery keeps up with feeding all your accessories easily. A quality lithium battery pack will easily manage heat too, which matters when your cart bakes in the Florida heat or gets used during the Arizona summers (like our shop carts do).
2. Your New Battery Warranty Will Outlive Your Cart
Most Gen-1 Lithium RXV carts left the factory with an 8-year battery warranty. Do the math on a 2017 to 2021 cart and that coverage is either already gone or circling the drain. The better aftermarket brands back their packs with a warranty the factory never dreamed of, some of them are even limited lifetime warranties. Lifetime. That’s the kind of number you can take to the bank, and it’s a big reason our customers stop considering OEM replacements and just call us for an upgrade that saves them cash at the same time.
3. You Can See Your Battery Health (Management App)
Your RXV ELiTE is amazing in so many ways, but something the EZGO factory never handed you is a way to actually see your own battery and what's going on with it. The lithium batteries we sell for RXVs all have apps that let your battery talk to your phone, so you can check your charge level from your living room, keep an eye on battery-cell health, and update your battery's brain (its firmware) yourself easily. Your old Samsung system was a sealed black box (literally, and figuratively) with no information visible to you as an owner.
4. Still Fits and Works Like the Factory Meant it To
The right battery replacement kit for your RXV Gen-1 cart comes with a pack that is properly shaped for the 2017 to 2021 battery tray/mold, and it's built to drop-in easily without having to hack-up your cart. No spacers stacked up high, no praying it will clear the seat. It goes right where the Samsung SDi came out (ECO calls their version the “Skinny” size). You’ll drill a couple hold-down holes and that’s the only “modifying" you'll need to do to get your kit in.
5. Lithium Golf Cart Battery Brands Live and Breathe Golf Carts
Lithium golf cart battery brands (ECO, ALLIED, BOLT, MODZ, etc.) focus on golf carts exclusively; it means they aren't busy making TVs, microwaves and dishwashers. They are busy making sure your BMS firmware is updated and studying the latest hardware in the carts coming off the assembly line at EZGO so you don't just get something that works to power your cart, you get what's best to power your cart.
What You’ll Need for the RXV ELiTE Battery Replacement
What you’re after is a EZGO RXV Lithium Battery Replacement made for the RXV ELiTE, from a brand such as ECO Battery or BOLT. Two things matter most here are:
- Plug-and-play compatibility with your factory EZGO harness and accessories (that’s what keeps this a bolt-in job instead of a wiring nightmare).
- Trusted firmware that won't cook anything on your cart (we only sell trusted brands here at the GCTS).
For this install, we’re walking through the ECO Battery factory RXV ELiTE replacement kit for the Gen1 Samsung swap. Right now it costs around $2,000 (60Ah) or $2,600 (105Ah), ships free, and both are much less than what the less-powerful factory replacement OEM Samsung unit costs. And the ECO kit here includes everything you need (comes in the box).
Here’s what comes in the RXV battery replacement kit (this is the ECO box we’re using):
- 48V 105Ah Pack - ECO's “Skinny” shape that fits your 2017-2021 RXV battery tray
- 48V CAN Charger - (15-amp, and it actually talks to the battery while it charges)
- The Samsung Adapter Harness, very important - because this is the little piece that lets an ECO battery pack speak fluent RXV and match up with all your cart's factory functions (part number A-4137)
- LCD Charge Meter - a real percentage readout, not four little bars that leave you half-guessing
- Charge Port for where your RXV receptacle used to be
- Remote Wake-Up Button that powers the pack on and off, can be mounted anywhere you like (dash, body, etc.)
- 12-Volt Reducer/Converter - protects your lights, radio and accessories from getting cooked (it’s technically an add-on, get it anyway)
- Hardware - every nut, bolt and bracket you need
- The instruction booklet (and this guide, of course)
Tools You’ll Need
- A socket set (pretty much all 13mm and 14mm here)
- Torx bits for the dash and cover screws
- A drill with a 3/8" bit (to make the hold-down holes)
- A handful of zip ties for cable management and keeping things clean
- A marker, to mark your drill holes
- Optional: A torque wrench (10 ft-lb for the hold-down, 8 ft-lb for the terminals)
- Your phone, with the EB Power app installed (this is the firmware step, don’t forget it)
Step-by-Step: RXV Gen 1 ELiTE Battery Replacement
Time Required: One morning or afternoon (3 to 4 hours your first time)
Difficulty Level: Moderate (if you can turn a wrench and follow along, you’re fine)
Step 1: Get Your Cart Ready
Pull the seat off and set it aside (it slides right off its hinges). Find the Tow/Run switch under the seat and flip it into TOW mode, then make sure the key is off (to prevent SHOCKERS baby!). These steps cut power while you work, which is exactly what you want when you’re about to put wrenches near battery terminals.
- Seat off
- Tow/Run switch to TOW
- Key OFF
Step 2: Remove the Controller Cover
Up front you’ve got a black plastic controller cover (under the passenger side). It has orange and white safety stickers on top. Take it off so you can get access to the solenoid underneath and the main wiring later on. Drop the screws in a cup or plastic ziplock (label it with a marker), you’ll thank yourself in about two hours when it’s time to put everything back.
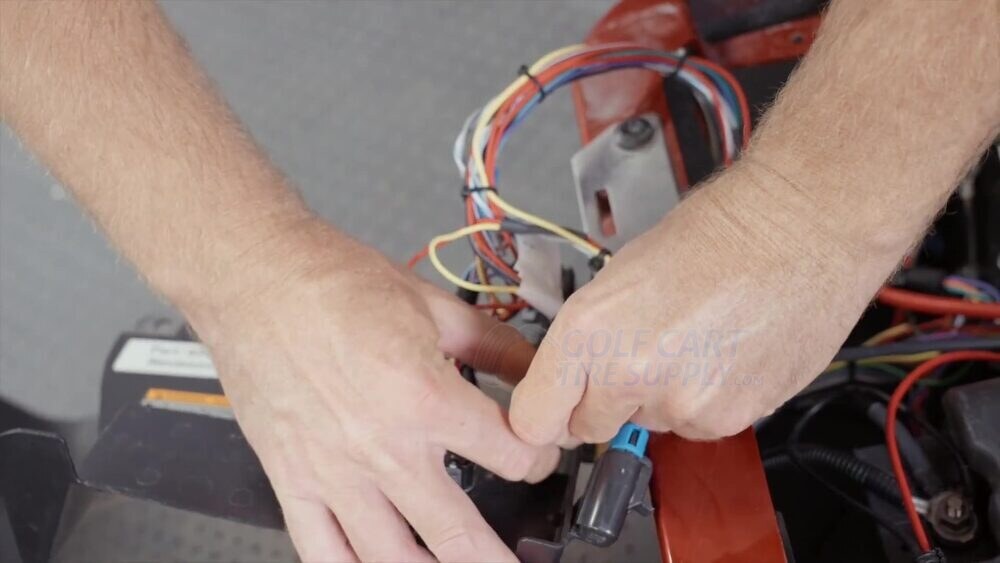
Step 3: Disconnect the Battery Communication Plug
Your Samsung system has a communication plug (the "comp plug") that lets the battery talk to the cart. Unplug that one first, before you loosen any of the big cables.
Pro Tip: Snap a couple quick phone pics before you unplug anything. When you’re staring at connectors an hour from now, past-you looks like a genius. And if future-you gets too stuck, you can always put everything back how it was.
Step 4: Disconnect and Bundle the Battery Cables
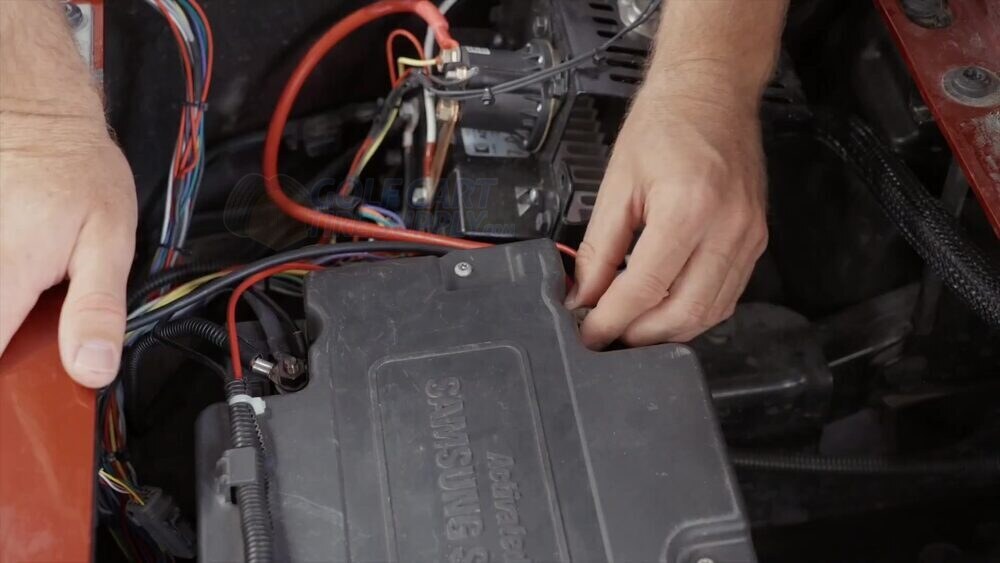
Now the big cables. Loosen the main terminal cables off the Samsung pack, then group them together with a zip tie so they stay out of your way and you know which is which. Your main positive and main negative cables will be used with your new pack, so keep track of those.
Step 5: Remove the Battery Hold-Down Hardware
Undo the factory hold-down hardware that’s pinning the Samsung pack into the tray. The ECO kit gives you fresh hardware for the new battery, so this factory stuff is just coming off to free the pack and won't be reused. You can toss it.
Step 6: Lift Out the Factory Samsung Pack
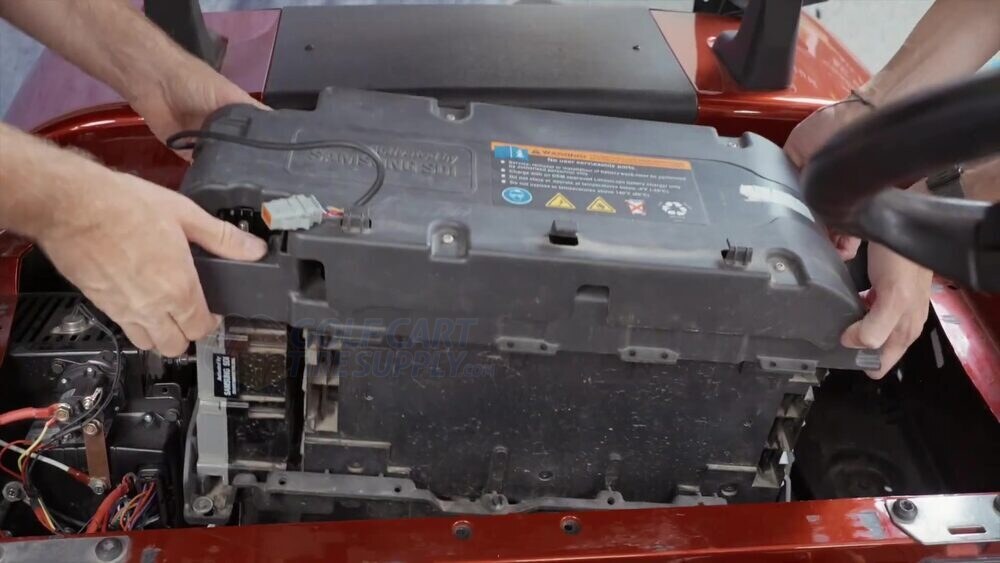
Stretch out those muscles, because here’s the big moment. Lift that black Samsung SDi battery pack up and out of the cart.
Safety Warning: this pack is not light, so brace your core and lift with your legs (not your back). If the angle is weird, grab a buddy for thirty seconds. Or your wife. Don't be a hero!
Step 7: Free the Factory Mounting Rods and Reset the Tray
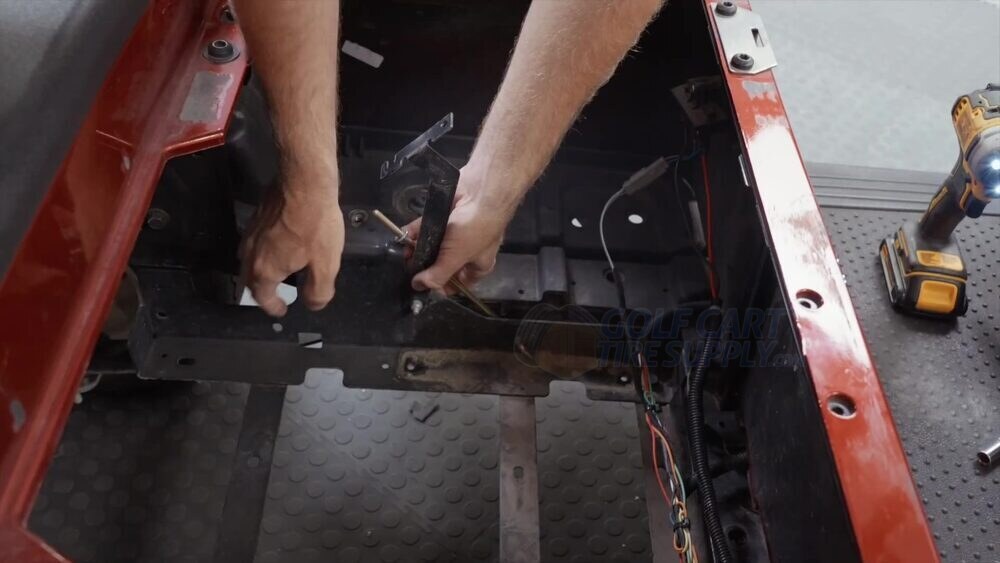
With the battery pack removed, those factory mounting rods won’t lift free on their own, so you’ll have to loosen the battery tray to work them loose. Pull the rods, take out the side rods too, then reinstall the tray with its hardware so you’ve got a nice clean base for the new ECO Battery pack to sit on.
- Undo the battery tray
- Pull the factory mounting rods
- Remove the side rods
- Reinstall the tray hardware
Step 8: Set and Mark Your New ECO Battery
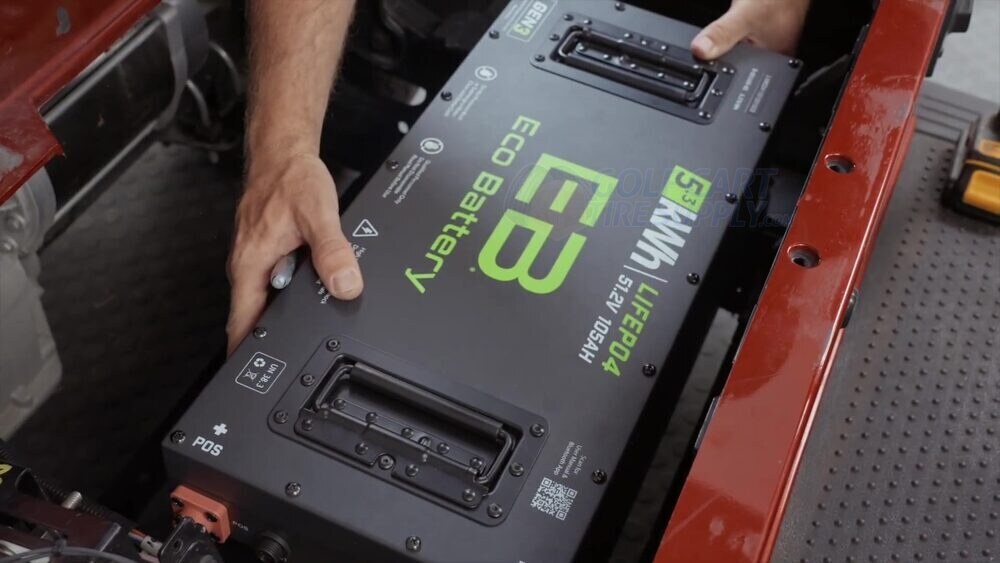
Your Gen-1 kit ships the Skinny pack (you can choose the cube kit if you like, but we recommend the skinny) - it's the one shaped for the 2017-2021 tray. Drop it in with the terminals facing the passenger side (important), line it up where you want it to live, and mark your holes for the hold-down hardware with a permanent marker.
Note: Our install video also walks through the through-hole and cube-shaped packs, which use a slightly different bracket (the through-hole one gets a center rod). If you somehow ended up with one of those instead of the Skinny, jump to your battery type in the video. Once the pack is seated, every electrical connection from here on out is the same no matter which shape ECO kit you’ve got.
Step 9: Drill and Mount the Battery
Lift the new battery pack back out, drill on your marked hole spots with the 3/8" drill bit, then set the battery back down in the tray and run the hold-down hardware. Tighten it up and torque it to 10 ft-lb (that’s 120 inch-pounds if your wrench speaks inches). If you don't have a torque wrench, just get it snug and then give one half-turn beyond snug.
Step 10: Remove the Side Skirts and Floor Mat
Before we get into the dash, we need a clear path to run the new gauge and wake-up cables under the floor. Both side skirts come off first with T45 Torx bolts (five on each side), then the floor mat lifts out once you pop its plastic rivets. Toss all that hardware in a cup, the little rivets love to roll off and hide, and you’ll want every one of them when it’s time to button things back up.
- Side skirts off (T45 Torx, five per side)
- Floor mat rivets out (keep them all)
Step 11: Remove the Lower Dash Trim (Cup Holders)
Your cup holder assembly is the lower dash trim piece. Three 10mm nuts hold it on from underneath, so loosen those up and lift the whole cup holder straight up and out. This opens up your lower dash so you have room to fish cables through this area. If you have a USB port, phone charger or other accessories wired into your dash then now is the time to unplug them or leave enough slack to swing it out of the way so they don't get damaged.
Step 12: Remove the Upper Dash Trim (Mind the Cowl!)
4 x T30 Torx screws hold the upper dash trim in place on the RXV. And the moment that last T30 comes out, the whole front cowl is loose up top and can then nose-dive toward the ground in front of your cart if nothing’s holding it. So keep a hand on it as you back out that final screw, or have a helper hold it for you. Once it’s loose, you can gently set the cowl down on the ground (but we recommend resting it on an empty box, so you’re not hanging any weight on your headlight wiring).
Step 13: Disconnect the Dash Electrical
Your upper dash is still tied to the cart by a few connectors. Unplug these so you can pull it away:
- Headlight and light connections
- Ignition switch connector
- Factory charge meter connector
Any plug with two or more wires in it, grab a picture first, because all of these connections need to go back in their original spots, or your headlights and accessories might not work the way you hope once you’re buttoned up. And the last thing we want to do is have to open up the dash again to fix any wires put in the wrong spot!
Okay, so once you have the connectors loose, lift the upper inside dash right out of the cart and set it on the bench, or nearby ground (on a blanket).
Step 14: Pop Out the Factory Charge Meter
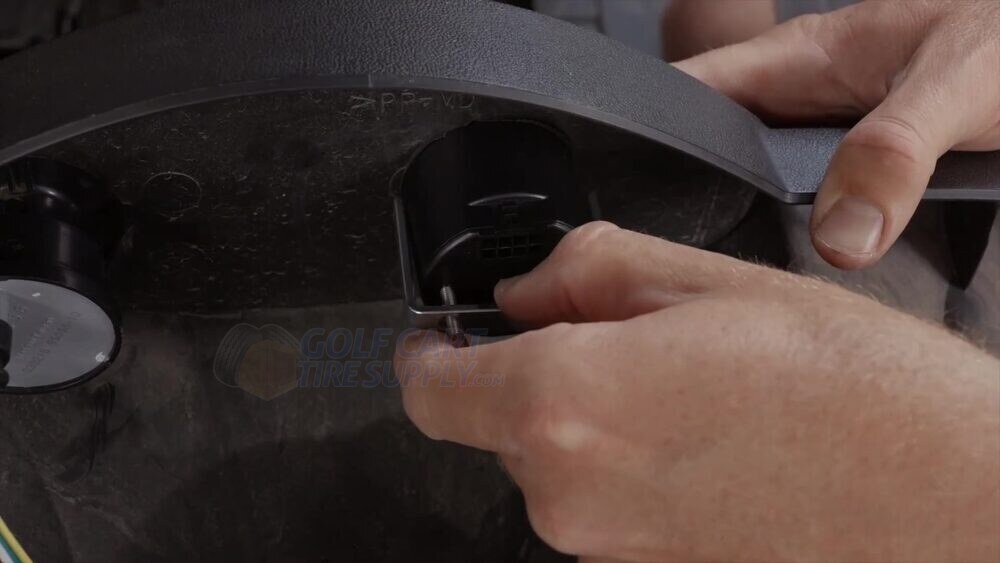
After removing the dash, flip the upper dash piece over and find the backside of the old factory charge meter. Pinch the little tabs on each side of it and it will pop right out the front side of the dash. You won’t be needing this gauge anymore, because your new ECO state-of-charge meter is about to move right into that same spot. So you can either stick this old factory charge gauge on the shelf, or toss it (we usually toss them).
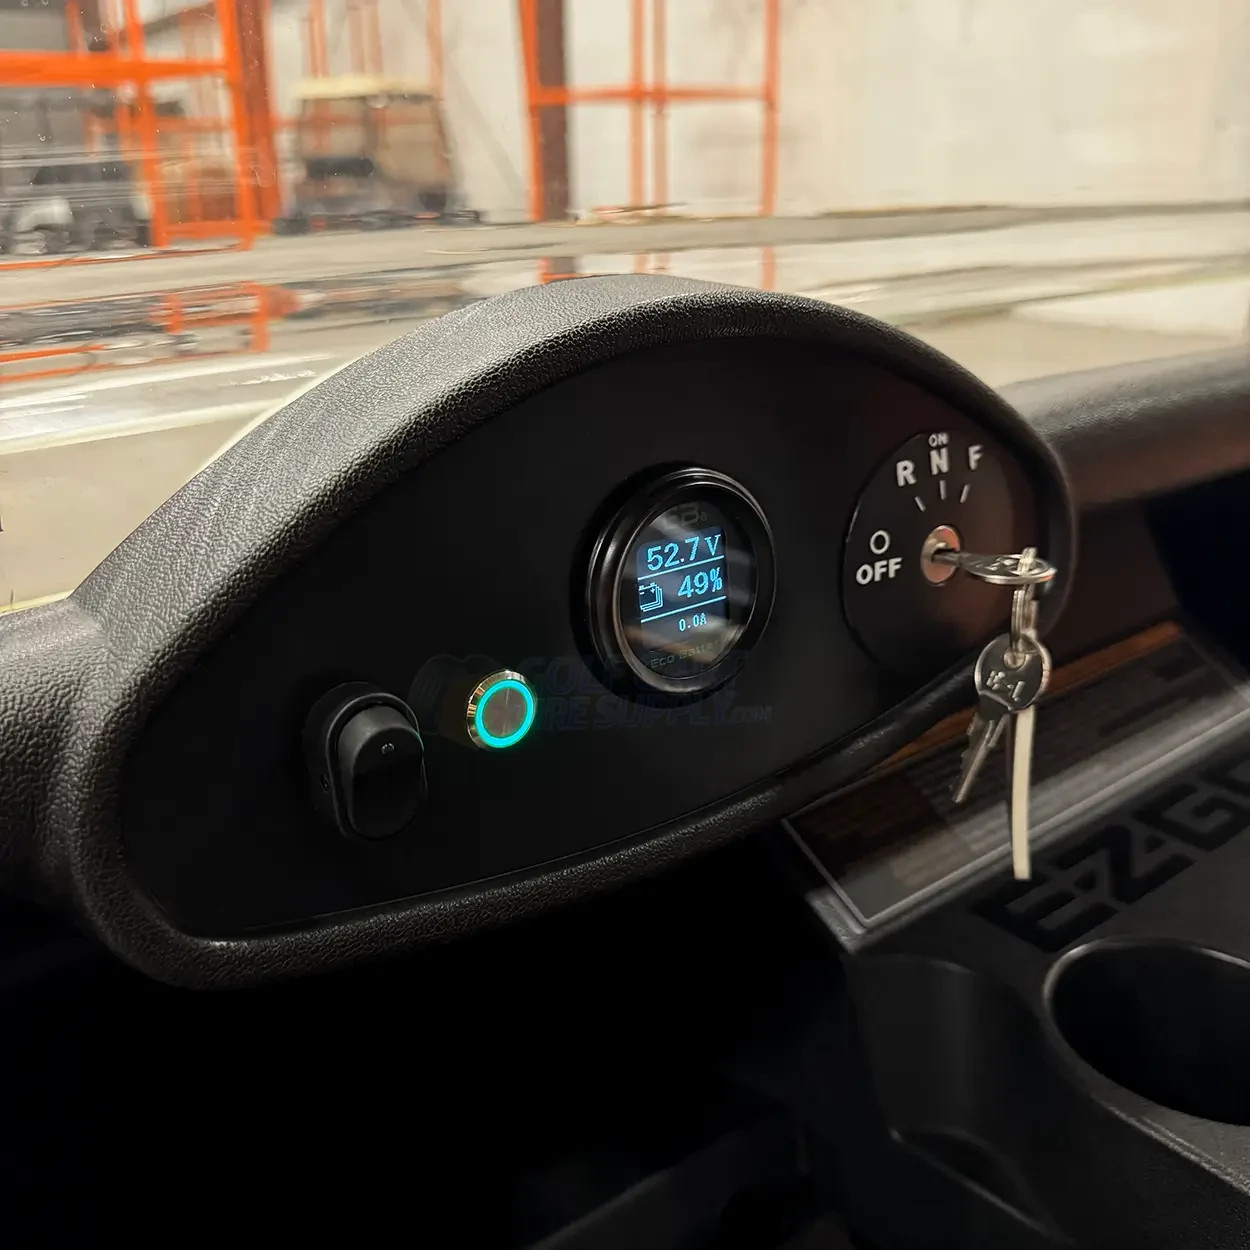
Step 15: Mount the new State-of-Charge Gauge
Pick a spot on the dash for your new gauge (anywhere you like). We recommend a clean flat area right in the center or center-left. You can see where we do our own shop carts in the image below:
And here is what the backside of the gauge install will look like:
Step 16: Drill and Route the Wake-Up Button
Your kit comes with a remote wake-up button that gets mounted on your dash as well (it powers the pack on and off, without you having to lift the seat up to get to the battery each time), and now’s the time to get it in place. Grab a 5/8-inch bit and put a hole in the dash wherever you want the button, we like ours right next to the state-of-charge meter. Knock off any plastic burrs so it sits nice and flush, then hold the button in place with the nut from the bag, and thread it on from behind the button to lock it in place.
For the wakeup button cable we will just route it the same way we did with our SOC cable. Feed the non-button end down behind the dash, through the center channel, and up into the battery bay, stashing most of the slack down there so the dash stays clean. Then plug it into the orange comm connector from your battery kit.
Step 17: Route the SOC Gauge Cable and Connect BatteryCom
Alright, now we need to go the other way and route the SOC cables from inside the battery bay, through the floor channel and up to the gauge to give it power. So grab your State-of-Charge meter cable (it’s got two connectors on the end), and wrap some blue painter’s tape around the pair before you pull them through the floor channel - to keep them safe and to make them both easier to feed through. Starting at the battery/ battery bay, run the SOC cables the opposite direction this time, from the bay, under the kick panel (little wall that meets the floorboard) through that center floor channel and up behind the dash, right alongside the wake-up cable. Leave some slack in the bay and leave these connectors loose for now, we’ll finish them up shortly.
While you’re down in the bay, grab the 5-pin BatteryCom cable and plug it into COM Port 2 on the battery. That’s the line that lets your new battery pack and your gauge talk to each other, so make sure it is nice and tight.
Step 18: Reconnect your Dash Wiring
Time to get your dash back in and ready for action. Reconnect everything you unplugged earlier (this is where those photos come in handy). Reconnect:
- Both new gauge plugs onto the back of your new SOC meter
- The wake-up cable lead onto the back of the button itself
- Your ignition switch, back the way it was
- Your light connections (watch the stack order, top to bottom it’s black, then red, then yellow)
- Anything else you had plugged in up there
Step 19: Put the Dash Trim Back Together
Now just work backward through our teardown: side skirts first (5 x T45 per side), then the floor mat (all eight rivets back in their holes), the cup holder (it's 3 x 10mm nuts), and last comes the upper dash trim up top (4 x T30 Torx). Take your time so everything is nice and tight and all your trim is flush. A rattle in the dash will drive you crazy on the very first ride, and won't match how nice your new lithium setup is.
Step 20: Swap Factory Charge Port for the new Charge Port
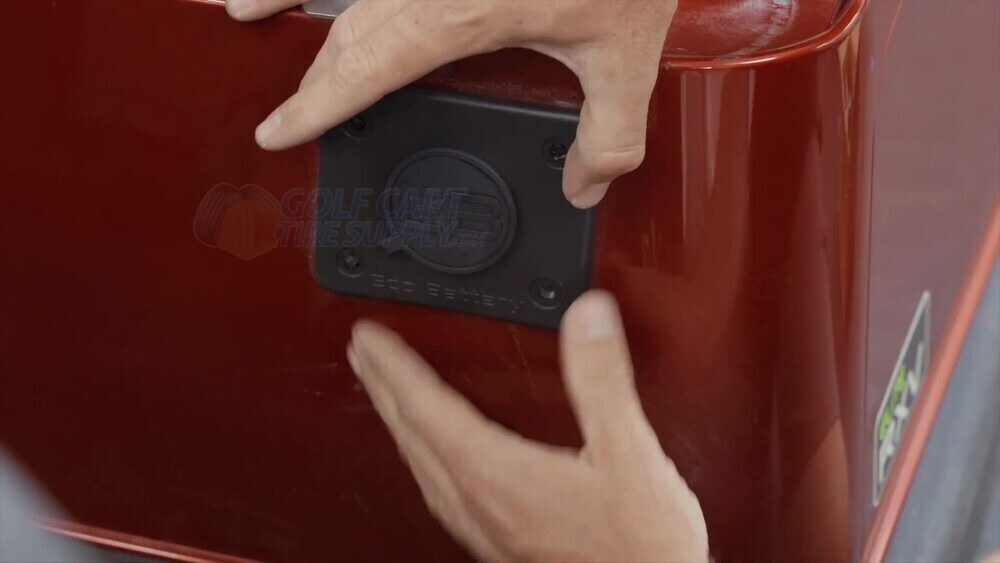
Time for the charge port! Unplug the Deutsch connector (grey with orange inside, and light blue cable lead) from your factory charger interlock, pop off the charge port bezel, and install the new charge port in its place.
Step 21: Install the On Board Charger (OBC)
Set your new Charger (ours is the ECO Battery branded charger in this install) into the position you like best in your battery tray and mount it down solid (we use self tapping screws), then connect it to the charge port you just put in. Good lithium batteries include an OBC like this (on-board charger). This onboard charger rides in the cart with you, and allows you to plug your cart into any standard 110v outlet, anywhere you go. So give it a good home where it’s not gonna rattle loose or get damaged!
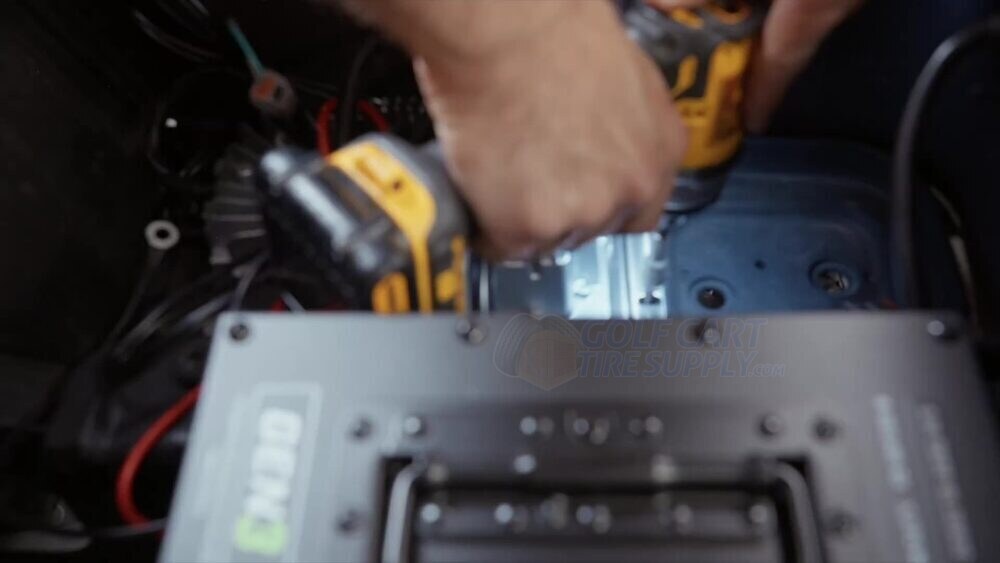
Step 22: Handle the Charger Interlock
Small, quick step - but important. Your factory RXV kit's charger interlock has a section on the end you won’t be using, so remove and toss that piece. Then connect the charger interlock into your factory harness interlock (that’s the connector you freed up a couple steps back when you swapped the charge port). This is the safety handshake that tells your cart “hey, I’m plugged in, don’t go driving off,” so it won’t let you take off while you’re still on the charger.
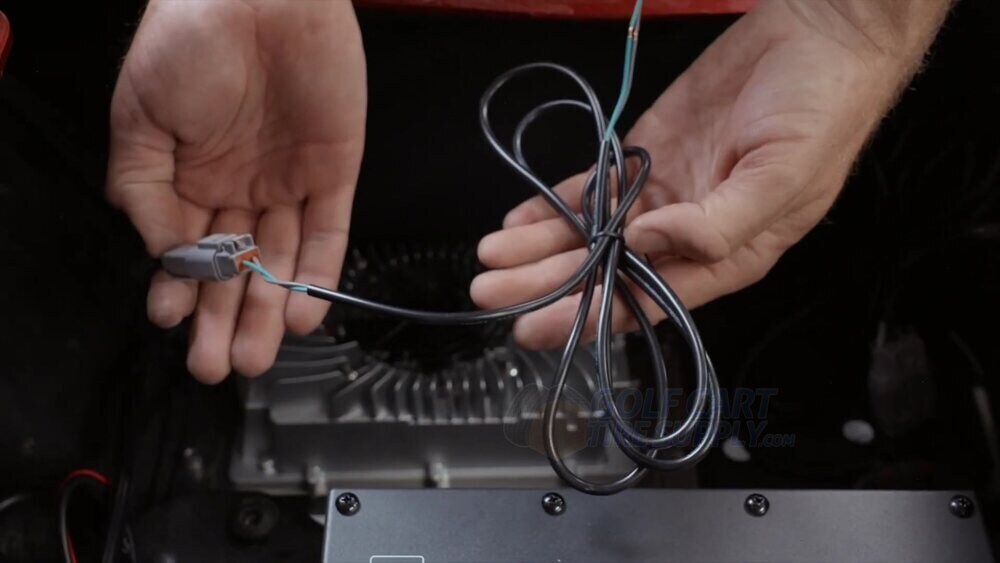
Step 23: Install and Wire the 12V Voltage Reducer
Your RXV ELiTE came with headlights (and you might have added a soundbar, USB ports, or other electronic accessories since then). All golf cart electronic accessories all run on 12-volts, and wiring them straight to a 48-Volt lithium pack cooks them fast. That’s exactly what the 12-volt reducer in your kit is for, it steps the battery’s 48V down to a safe 12V for all your low-voltage golf cart accessories. Mount it down in a back corner of the tray with the self-tappers (or anywhere in the tray that looks good to you), and then plug it into its harness.
Now that the Voltage Reducer is in place, we need to wire it up to work:
- Cut and strip back the reducer’s red and black wires using wire strippers. Then do the same for your accessory wires (headlights, sound bar, etc.) and then join them with butt connectors, red to red and black to black.
- The small yellow wire from the reducer will land on the battery positive, and the small black wire from the reducer will land on the battery negative (we’ll put those on the terminals in a couple steps, along with everything else).
- The orange wire is the one that talks to your solenoid, it’s what wakes the reducer up when you turn the cart on. Your controller cover is already off from way back in Step 2, so find the solenoid’s 13mm nut (it’s the one with a metal bar dropping down to the controller), loosen the bolt off, slip the orange ring terminal over the stud, and snug the 13mm bolt back down.
Step 24: Route the CAN and Charging Leads to the Terminals
Run your charger CAN line and the charging leads over toward the battery terminals so they’re sitting there ready to land. Keep them as neat as you can on the way over, because we’re about to hook everything up!
Step 25: Connect the Positive Terminal
Find your A-4137 harness (that’s your Samsung adapter). It's ring terminal goes to your battery positive. Stack your ring terminal, your charging lead, your main battery positive cable, and the reducer’s small yellow wire all onto the positive terminal, then torque to 8 ft-lb (96 inch-pounds).
- A-4137 ring terminal to positive
- Charging lead to positive
- Main battery positive cable to positive
- Voltage reducer’s small yellow wire to positive
- Torque to 8 ft-lb (96 in-lb), then snap the positive cover on
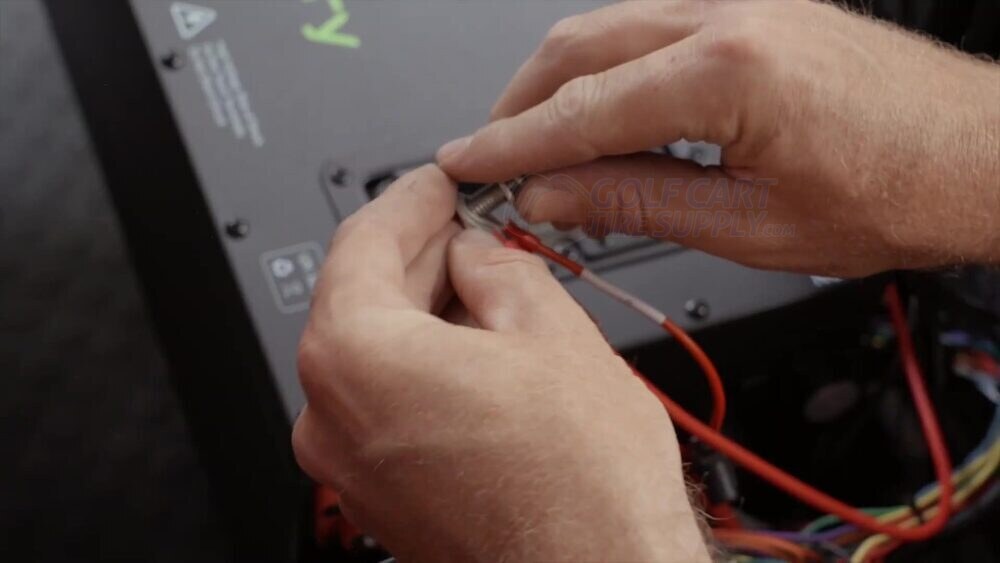
Step 26: Connect the Negative Terminal
Same thing over on the other side. We will need to place your negative charging lead, your factory negative cables, and the voltage reducer’s small black wire onto the negative terminal, torque them down to 8 ft-lb (96 inch-pounds), and snap the negative cover on.
Step 27: Wire Up the CAN Communication
There’s two CAN connections coming off COM Port 2. Connect your charger CAN to one of them (doesn’t matter which one), and connect your A-4137 to the other. That’s your whole system talking to itself now: the battery, the charger and the adapter all working together.
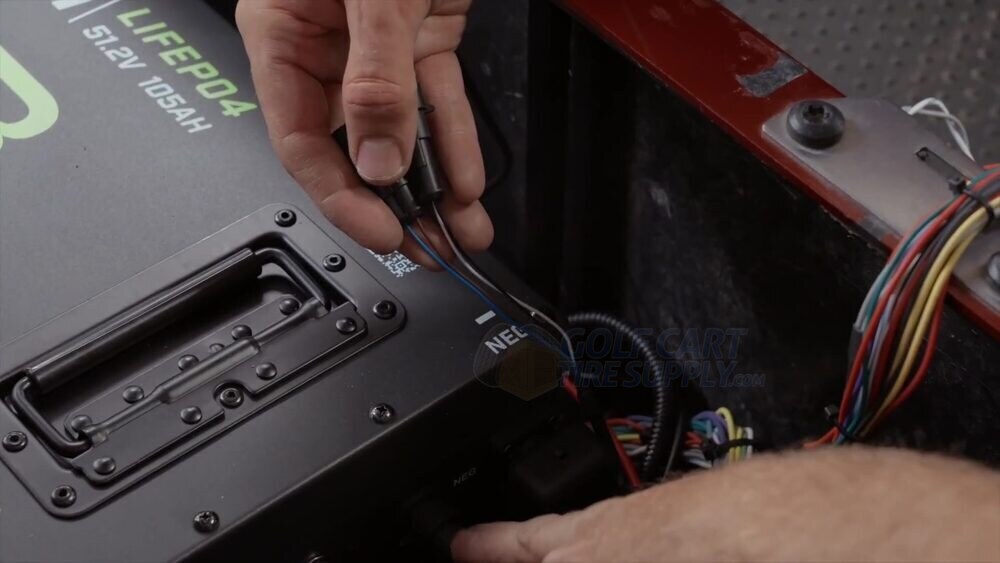
Step 28: Plug the Harness In and Close the Controller Cover
Now we will want to plug the harness connector into the factory plug, and then put your factory controller cover (with the black/orange warning stickers on it) back on. Take an extra thirty seconds to clean up any last connections so nothing’s flopping around loose down there. We love good cable management!
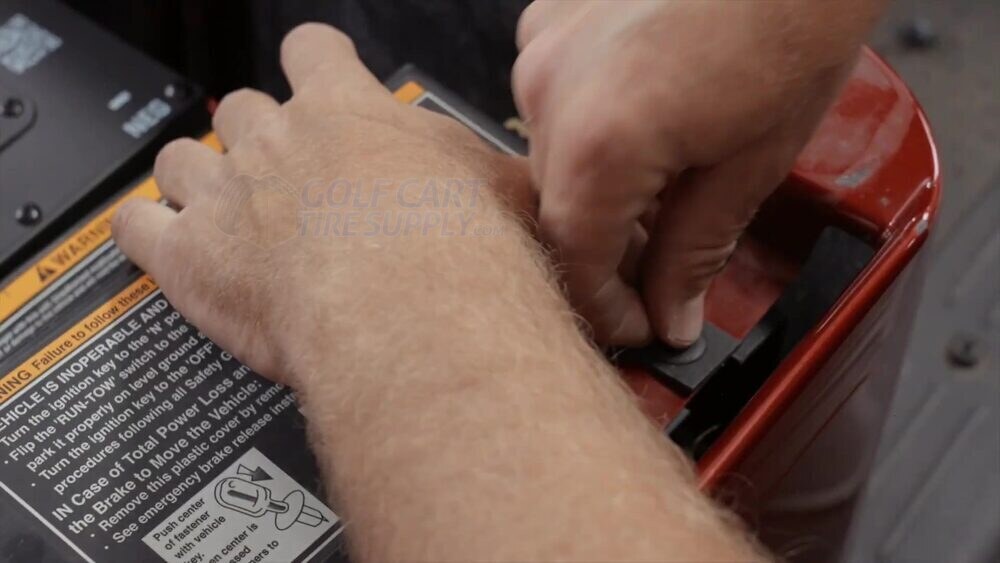
Step 29: Flip Your Cart to RUN mode and Reinstall Your Seat
Flip your Tow/Run switch back to RUN and set your seat back on the hinges. You’re basically done! But don't skip the very last step.
Step 30: Update the Firmware and Test
Pull out your phone and make sure your battery is on the latest firmware using the EB Power app - or whatever brand battery you are using (it’s Bluetooth, and only takes a few minutes). This is the step people skip and then call us confused about. Once you’re updated, press the wake-up button switch and watch your new charge-gauge come alive!
Welcome to a Lot More Range
And that’s a wrap on your EZGO RXV ELiTE lithium battery replacement. Woohoo! You just took a Gen-1 RXV that was limping along on a worn-out factory Samsung SDi pack (or not moving at all) and gave it a battery that can likely outlast the cart itself! More range, more responsiveness, an app that tells you about your battery's health, and a warranty that goes far beyond what you're used to.
At right around $2,600 (105 Amp-Hour kit) with free shipping and that limited lifetime warranty, you came out with more battery than the OEM would’ve sold you for more money, and you did it in your own driveway. Next time somebody at the course is grumbling about their fading ELiTE pack, you’ll know exactly where to point them!
RXV ELiTE Battery Replacement FAQ
How do I know if I have a Gen 1 or Gen 2 RXV ELiTE?
Lift the seat and look at the battery color. A black Samsung pack means Gen 1 (about 2017 to 2021), and this is your guide. A white pack means Gen 2 (2022 and up), and you’ll want the Gen 2 guide since the adapter and a few steps change. When in doubt, your cart’s serial number or a quick call to us can get you an answer in 1-minute.
Will the ECO Battery packs fit my factory tray, or do I have to modify the cart?
They fit. The Gen-1 kit ships the Skinny pack that’s shaped for the 2017-2021 tray. Although the cube-shaped through-hole setup from ECO Battery fits your RXV cart as well. So you can't go wrong with either. You’ll just drill a couple of hold-down holes, which is totally normal, but there’s no cutting or fabricating going on. It sits right where your factory Samsung came out.
Do I reuse my old Samsung charger?
No. And you wouldn’t want to! A good replacement kit comes with its own matched 48V charger (ECO’s is a CAN charger that talks to the pack the whole time it’s charging). Running a mismatched charger on a lithium pack is exactly how you cook a battery, and void the warranty right along with it. Use the one that comes in the box.
What is the A-4137 harness for?
That’s the adapter (part number A-4137 in the ECO kit) that lets an aftermarket battery drop into an ELiTE RXV without you rewiring the whole cart. It’s basically the translator between the new pack and your RXV’s factory plugs. Gen-2 carts use a slightly different adapter, which is one of the reasons we split these guides in two - but the concept is still the same.
How much range will I actually get?
The 105Ah ECO kit is good for roughly 30 to 45 miles on a full charge, depending on your terrain, your tires, how heavy your right foot is, and whether you’re hauling a lifted setup around. Call it a full day of golf plus the ride home, and a bit even more - with ease. Not sure which Amp Hour setup is best for you? Be sure to check out our Lithium Golf Cart Battery Range Calculator.
Do I really have to update the firmware?
Yes. The install requires getting your ECO Gen 3 BMS onto the latest firmware through the EB Power app. If you skip this you might see the gauge or the charging act a little weird. It takes a few minutes, it’s free, and it’s worth doing right.
Can I do this myself, or should a shop handle it?
If you’re comfortable with basic hand tools and you take your time, this is a very doable driveway job (most guys knock it out in a morning or afternoon). If wrenching isn’t your thing, any golf cart shop can handle it, or give us a call and we’ll help you find someone close by.
Need Help? We've got your back!
Got questions about your EZGO RXV ELiTE factory battery swap, or you’re still not sure if you’ve got a Gen 1 or a Gen 2? Give our Golf Cart Expert team a call at 1-844-422-7884. We sell and support more lithium batteries and factory replacements than just about anybody out there, and we’re always happy to make sure you get the right kit for your cart the first time around.