





 Sign in
 Blog
Blog
 Gift Certificates
 Contact Us
Club Car Tempo Lithium Conversion Guide
Posted by Alex Sturwold on Sep 17, 2026
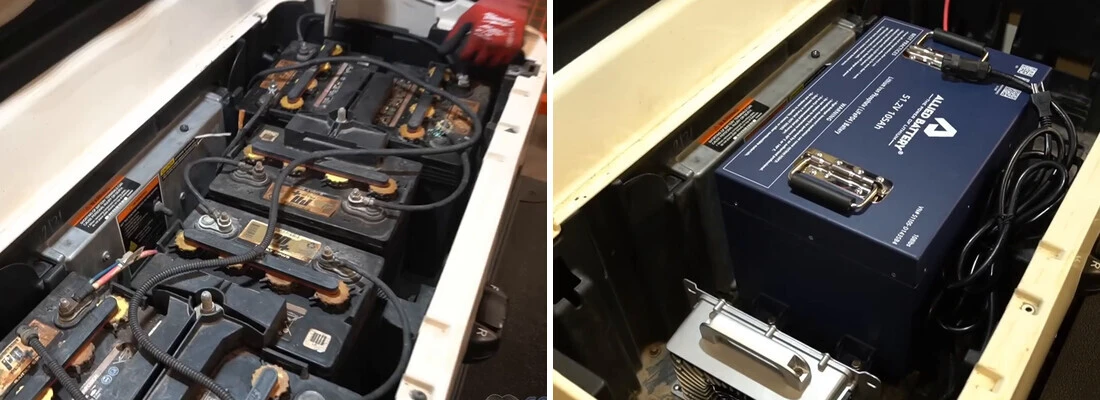
How to Convert Your Club Car Tempo to Lithium
If your Club Car Tempo is still running on six lead-acid batteries, you’re sitting on one of the smartest upgrades you can give your cart. There are a ton of Tempos out there that started life on a golf course and put in their years at a country club before ending up in somebody’s garage with a battery pack that was never exactly babied. Our own shop Tempo was one of them! We’d plug it in overnight, and 15 or 20 minutes into a ride it was already down to half power and wouldn’t climb a hill to save its life. When your charges stop lasting like that, your batteries are on their way out.
So we did what we tell our customers to do. We converted our 2019 Club Car Tempo to lithium, filmed the whole thing start to finish, and broke it into 14 easy steps so you can do it at home too. This written guide follows that video step-by-step, with extra detail (and extra photos) on the parts that are easy to mess up. Grab your socket set and a free afternoon (or morning), because this is a job you can absolutely knock out in your driveway yourself.
Every step below lines up with a chapter in the video, so if you’d rather watch a step than read it, just click the timestamp under that step.
Is Your Club Car Tempo Lead-Acid or Factory Lithium?
Before you buy anything: lift your cart's seat. If you see 6 x 8-volt batteries lined up in your tray (most likely with a skinny black watering line running across the tops), you’re in the right place, this guide is for you!
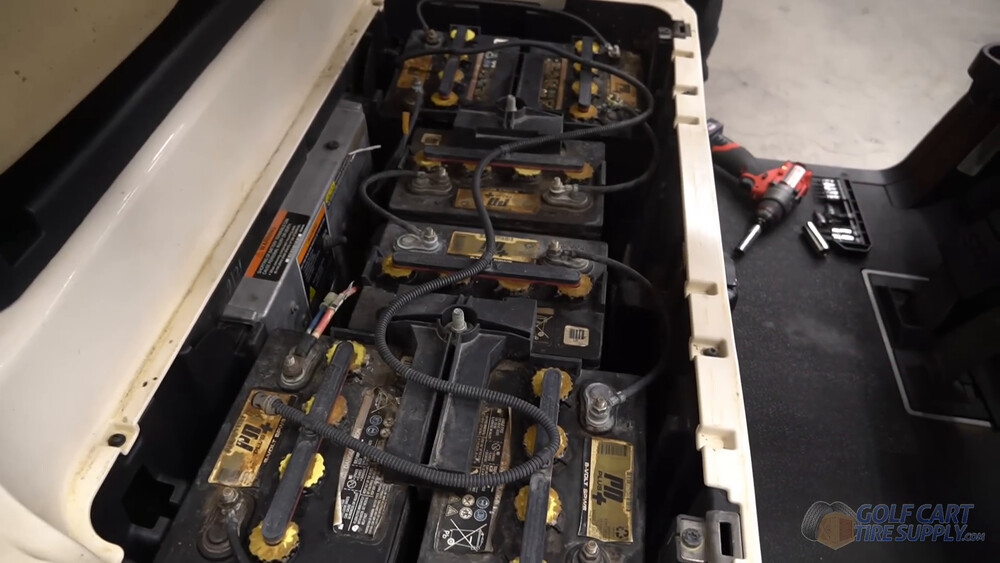
If you see one big factory lithium pack instead, you have one of the lithium Tempos that Club Car started rolling out in 2019. And you'll need a factory battery replacement, not a conversion. Our BOLT Energy Club Car Tempo Lithium Battery Replacement Kit is made for exactly those factory lithium carts (the ones with a Vanguard or LG OEM battery pack).
And there is some good news for older lead-acid Tempo owners... you won’t be dealing with an onboard computer (OBC) bypass! Lead-acid Tempos charge through Club Car’s ERIC system (which doesn’t use one). Not sure what year your cart is? Check out our Club Car serial number lookup.
Why Convert Your Club Car Tempo to Lithium?
(Watch this part in our video at 5:35)
You came here for the how-to, so we’ll keep the why part short. But the reasons are plenty (and listed below). And once you decide to go lithium, checkout our Best Lithium Golf Cart Battery list to make sure you get the right setup for your cart. Here's why lithium golf cart batteries are so great:
- Lots less weight. Six 8-volt batteries weigh around 60 pounds each, so you’re hauling 350 pounds of lead. The ALLIED lithium pack in our install weighs 108 pounds total.
- Zero upkeep. No watering, no crusty terminals, and no trickle chargers to deal with. Lead-acid batteries that get neglected can die out in just a couple years.
- Full power until the end. Lithium batteries are just like your cell phone battery, so you still have all of your power down to the end. Lead-acid just gets weaker and weaker slowly as it drains.
- Quicker charging. 80% charge in about 2 to 3 hours, with the rest not taking much longer. Lead-acid wants to sit on the charger overnight (or 6 hours just to get to around 80%).
- It lasts. A brand new set of lead-acid batteries gets about 6 years in our shop carts. Lithium should give you 8, probably 10. And many now come with lifetime warranties.
Yes, lithium still costs a little more up front than a new traditional lead-acid batteries, even though prices have come down a bunch over the last five years. But if your Tempo needs batteries anyway, lithium is the way to go. Just trust us, because we talk to hundreds of cart owners each week.
What You’ll Need for Your Club Car Tempo Lithium Conversion
(See what comes in the box in our video at 0:30)
The heart of this job is a 48-volt lithium kit that fits the Tempo. Whatever brand you land on, make sure the box includes bolt-down mounting brackets (your Tempo’s battery tray needs them, more on that in Step 7), a charger built for lithium, and a state-of-charge gauge.
For this install we used:
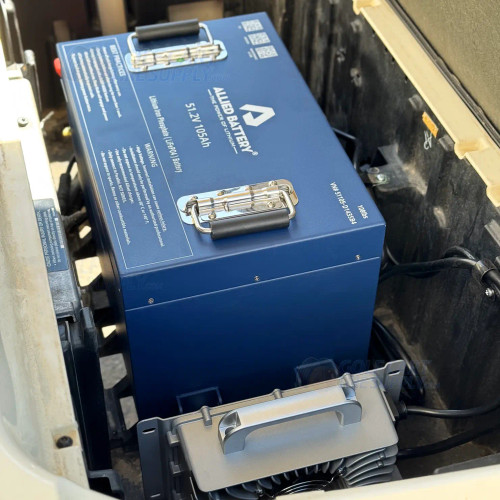
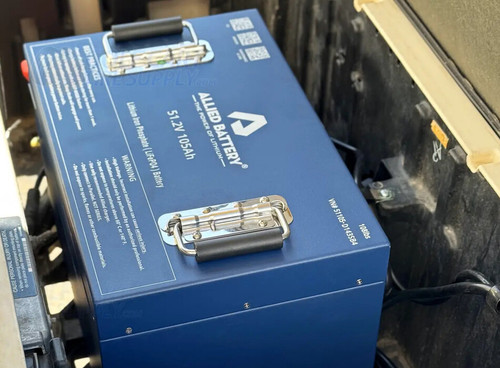
ALLIED 48V 105Ah BIG BOX Lithium Kit
Drop-in ready for a lead-acid Club Car Tempo. One pack, one charger, and the bolt-down brackets your Tempo’s tray needs.
- 51.2V and 105Ah, good for about 30 to 45 miles per charge
- One 108 lb pack takes the place of all six lead-acid batteries
- Waterproof 15 amp lithium charger, state-of-charge meter and Bluetooth app in the box
- 10-year ALLIED warranty (first 3 years at no charge, years 4 through 10 prorated)
Price: $2,248.95 $2,799.99 (you save $551.04)
Not sure it’s the right size for your cart? Call us at 1-844-422-7884.
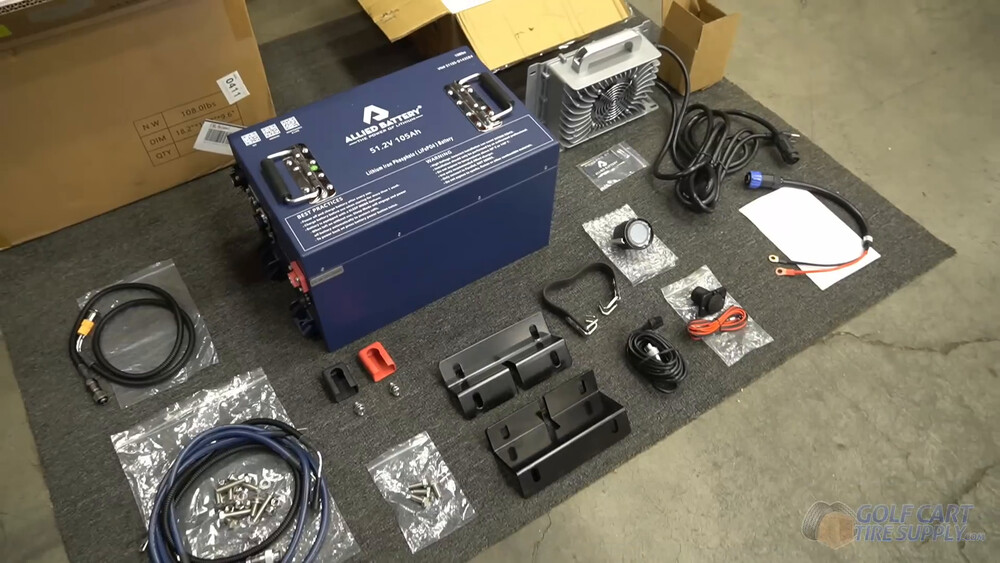
Here’s what came in our ALLIED box (most 48V 105Ah kits look a lot like this):
- 51.2V 105Ah lithium battery - one 108 lb pack that replaces all six of your old batteries
- Battery cables
- Mounting brackets that the battery’s feet bolt onto (the pack sits a little higher in the tray on them)
- On-board lithium charger - a 15 amp charger that mounts right in your battery bay and plugs into any wall outlet
- State-of-charge meter, the gas gauge for your new battery
- Battery strap for hauling the old lead-acid batteries out (nice touch, ALLIED)
- Hardware packet with nylon lock nuts, big washers, terminal covers, and the CAN and RS485 harness
There’s two add-ons worth thinking about before you check out.
- A 110V charge receptacle (about $85) that swaps into your factory charge port, so any extension cord plugs in right up front. We put one in on all of our conversions.
- A 48V to 12V voltage reducer if your Tempo runs 12-volt stuff like lights, a horn, or USB ports. The full install is in its own section at the bottom of this guide.
We carry Tempo-ready lithium kits from other brands too (ECO Battery, BOLT, MODZ and Trojan), and you can shop all of them in our Club Car Batteries section.
Tools You’ll Need
- A 1/2" socket and a 1/2" wrench (battery cables and charge port wires)
- A 5/8" deep socket for the battery hold-downs
- T40, T30, T27 and T15 Torx bits
- A drill with a small pilot bit and a 5/16" bit
- A 2" hole saw for the state-of-charge gauge (ours is a Hole Dozer from the hardware store)
- A speed square, tape measure and marker
- A fixed wrench to hold the lock nuts from underneath
- A screwdriver, flush cutters and a plastic trim tool
- Four #10 self-tapping screws for mounting the charger
- A couple of clips to hold the floor mat out of your way (laundry clips work great)
- A shop vac and a work light
- Optional: P-clips and zip ties for tidy wiring
Step-by-Step: Club Car Tempo Lithium Conversion
Time Required: An afternoon (or a morning, if you’re an early riser)
Difficulty Level: Moderate (the charge port and the kick panel are the fiddly parts)
Step 1: Remove the Seat and Put Your Cart in TOW
(Watch this step in our video at 1:53)
The seat on a Club Car lifts straight up and off its hinges pretty easily. Set it somewhere safe and grab a work light, because we're about to make your battery bay real pretty!
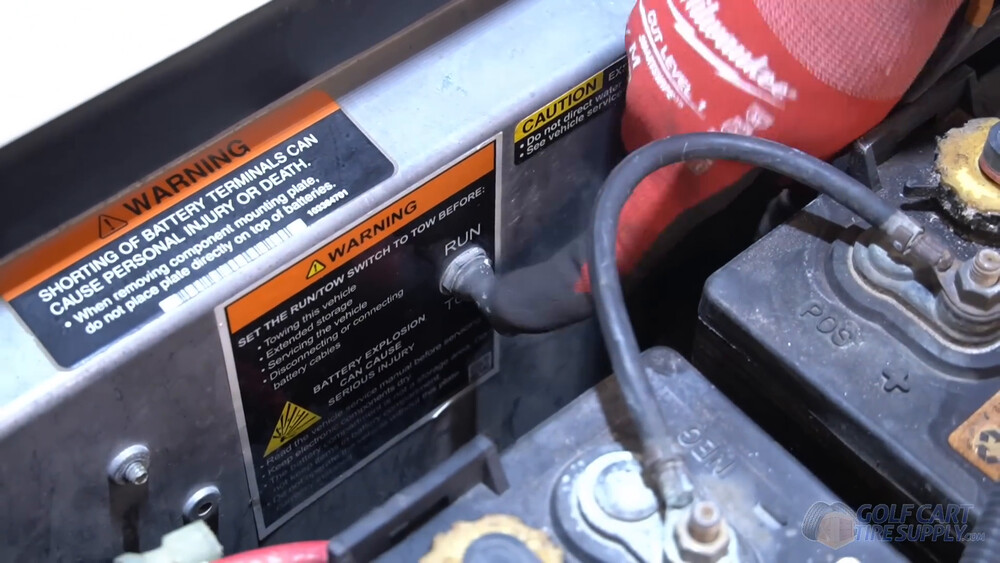
Find your Run/Tow switch on the silver panel inside the battery compartment and flip it into TOW. That protects you from getting shocked while you work (trust us, it’s happened before). Then double check that the key on your dash is in the OFF positon as well.
Step 2: Disconnect the Battery Cables
(Watch this step in our video at 2:31)
There’s a lot of cables in there, but don’t worry... only two of them matter for your new lithium setup. That’s your main positive and your main negative. Every other cable comes out with your old batteries and never goes back in.
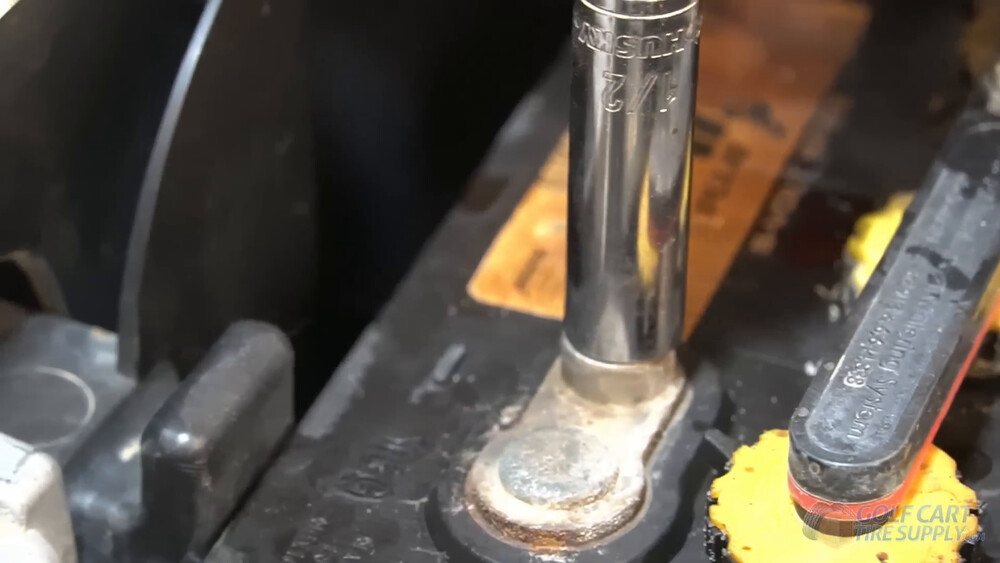
Start with your main negative, then work your way through the rest of the battery cables with a 1/2" socket. Wrap a piece of tape around your main positive and main negative (and any accessories cables you have running to them) so they’re easy to find later. They both come up by the silver panel on the driver’s side, and you’ll hook them up to your new battery in Step 13.
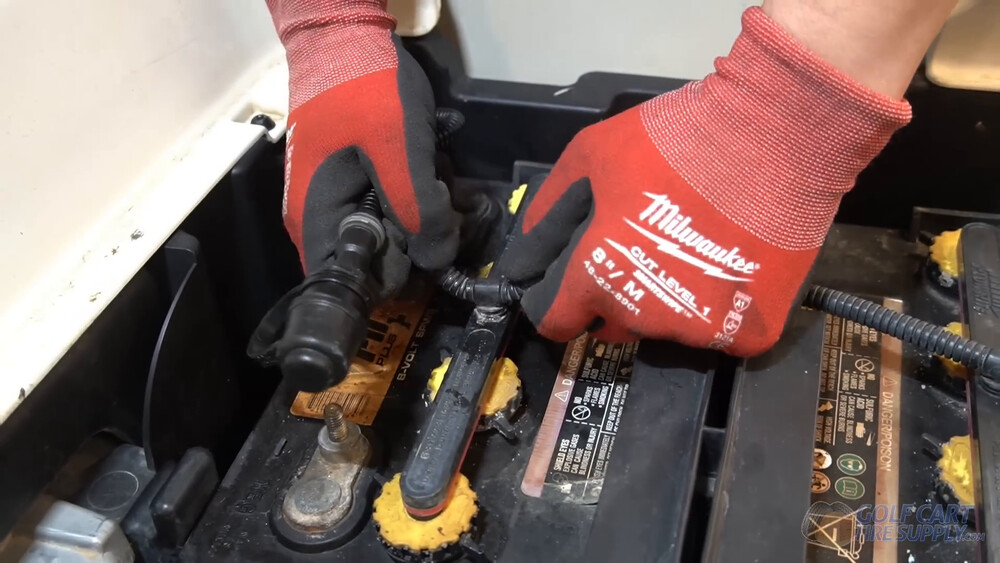
Your Tempo may also have a single point watering system (that skinny black hose-line running across the tops of your batteries). It pops out easily, so pull it off and toss that baby out! You never have to water a lithium battery, which is one of the best parts of the whole upgrade.
Pro Tip: Snap a few pictures of your battery bay with your phone before you pull anything. They come in handy if you ever need to double check how something was hooked up before.
Step 3: Remove the Battery Hold-Downs
(Watch this step in our video at 3:53)
This one’s quick! There’s one hold-down on each side of your battery bank, and each one clamps down three batteries. Grab a 5/8" deep socket, back them off and set them aside. Your new lithium battery bolts down a totally different way so you won’t need these again.
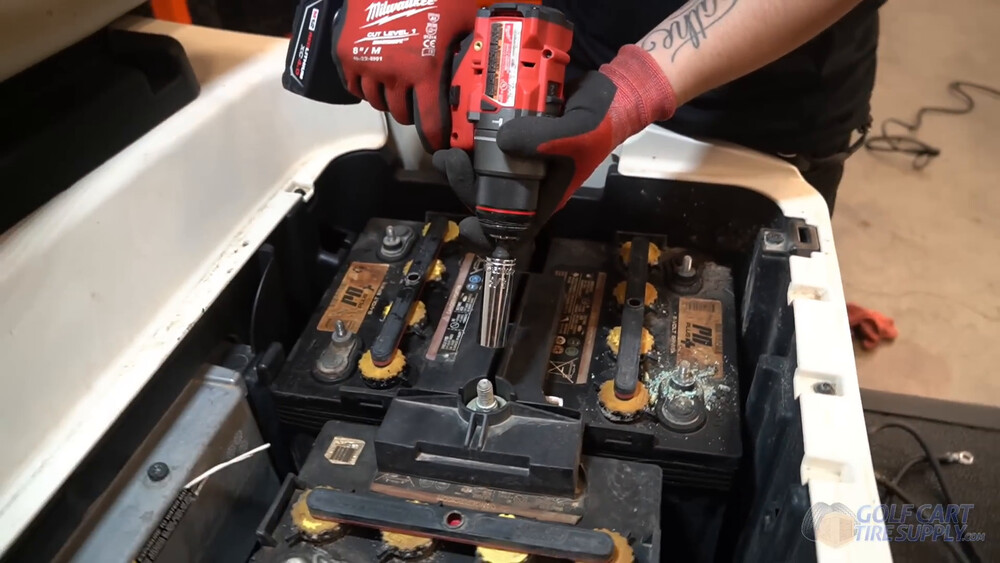
Step 4: Remove the Old Batteries
Time for your daily workout! Hook your battery strap under the end tabs of each battery and lift them out one at a time. No strap? Try an old leather belt (or a heavy duty nylon one) through the end tabs and it will get the job done too (yes, we’ve done it).
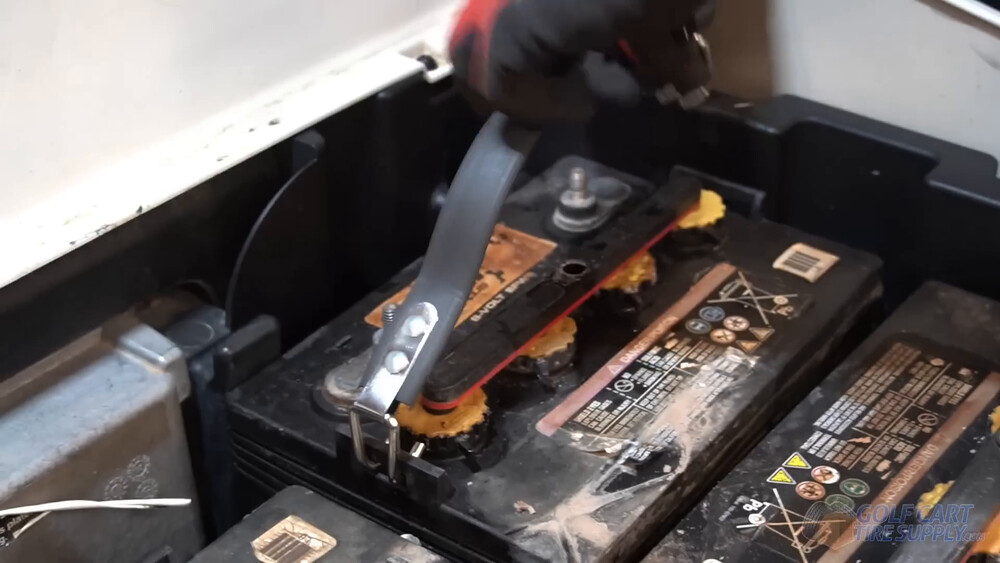
Safety Warning: Each of those batteries weighs around 60 pounds. Lift with your legs and keep the battery close to your body. And grab a buddy to help if you can.
Once your tray is empty clean it up with a shop vac. Ours had tons of dirt and a few leaves in it. And don’t throw your old batteries in the trash - drop them off at a battery recycler instead (and get a few bucks for the cores too)!
Step 5: Remove the Factory Charge Port
(We HIGHLY recommend you watch this step in our video at 8:18)
This is the first big one. Removing the factory charge port takes up about ten minutes of our video, more than any other step in this Club Car Tempo lithium conversion. And that's because there are several things you need to disassemble before you can get to the charge port.
Your Club Car’s factory charge receptacle is a round three-pin plug, and its wires run all the way back to your motor controller. You’ll unhook those wires first, then pull the receptacle out of your kick panel.
Part A: Unhook the Charge Receptacle Wires at the Controller
Your wiring looms are held together with a zip tie near the silver panel. Snip it so you can pick out the loom that runs to your charge receptacle. Then back out the single T40 bolt holding the silver panel and let the panel come down. Right behind it is your motor controller (the brain of your golf cart).
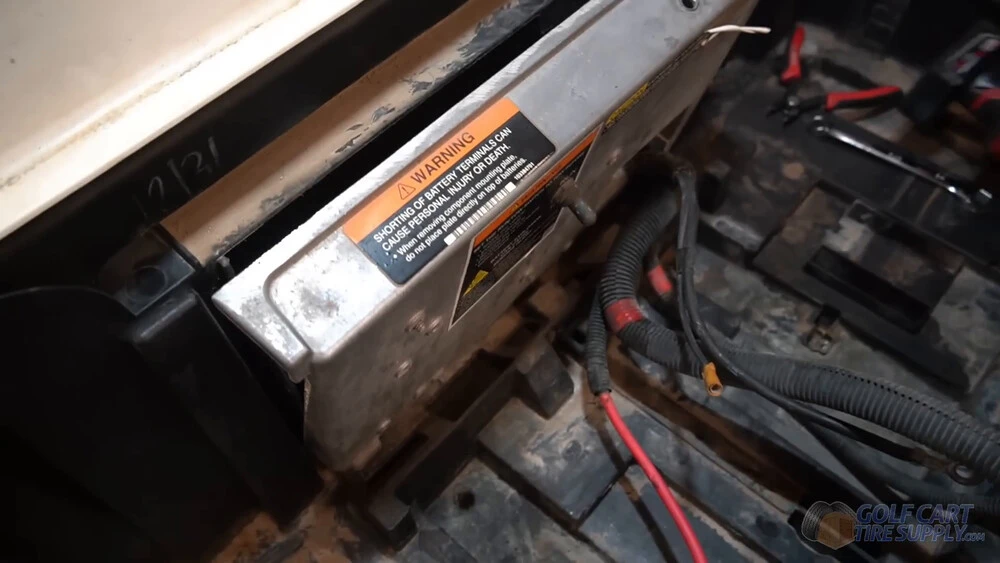
Only three wires come off the charge receptacle loom, and here’s how each one comes off:
- Red wire runs through a small inline fuse and sits on a solenoid terminal. Take the nut off with a 1/2" wrench and slide the red wire off. Then put the nut and washer right back on and snug them down, because your solenoid still needs a good tight connection.
- Blue wire is the easy one. It’s a simple pull-apart connection, so just pull it apart.
- Black wire sits on a terminal right on the controller. Take the nut off with your 1/2" wrench and lift off only the receptacle’s black wire. There’s another black wire under it from a different loom that stays put, so put the nut back on nice and snug.
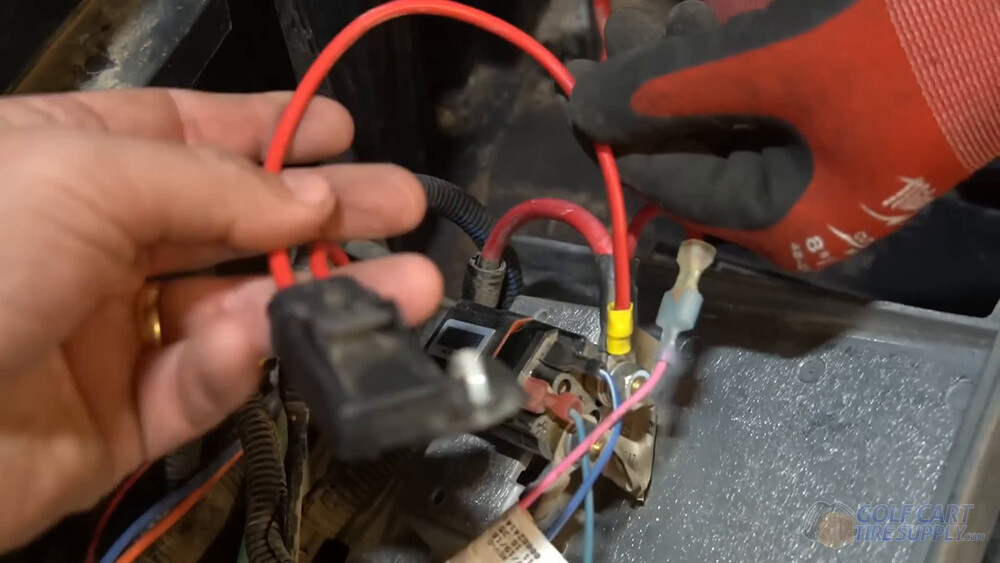
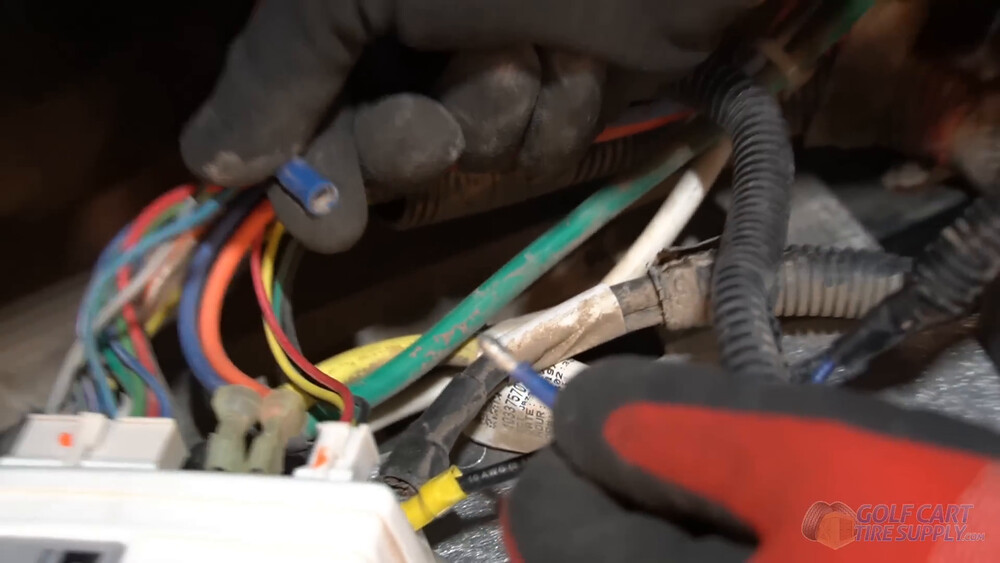
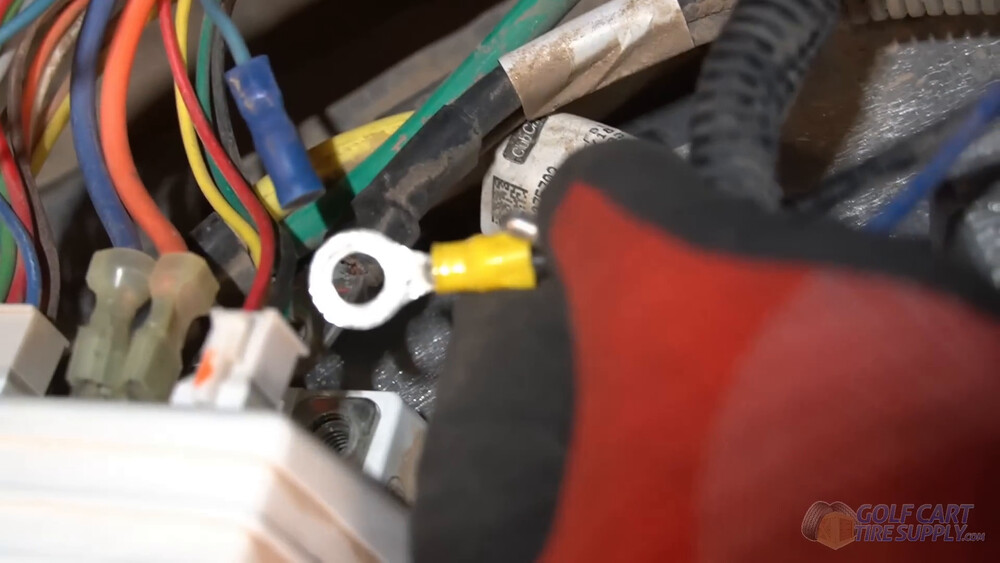
Leave every other wire back there right where it is, because the receptacle loom is the only thing coming out. Pull it through, then push the silver panel back into place (it takes a little persuading, a light tap with a hammer helps) and run the T40 bolt back in. The scariest electrical part of this whole install is now behind you!
Heads up: That blue wire is the charger interlock on Club Car’s ERIC charging system. When the factory charger is plugged in, it tells your cart not to drive.
Part B: Pull the Receptacle Out of the Kick Panel
Quick detour on why we’re doing this. Almost every lithium kit (ALLIED included) comes with an on-board charger that mounts right in your battery tray. You could leave the charger’s included plug cable in the battery bay and run an extension cord to it (but you have to lift the seat each time). Or for about $85, you can buy your brand's 110V charge receptacle that goes right in the factory spot, so any extension cord plugs into the front of your cart and it looks like it came that way from Club Car. That’s what we do on all of our conversions. Some kits even include this for free! Either way, the old receptacle loom has gotta go (come out).
Here’s the order we will use to get to your receptacle.
- Take off the side panels on the driver and passenger sides (T40).
- Pull your floor mat up and clip it to the pedals and dash so it stays out of your way.
- Remove the three T40 bolts along the bottom of the kick panel, then the two T30 screws on top.
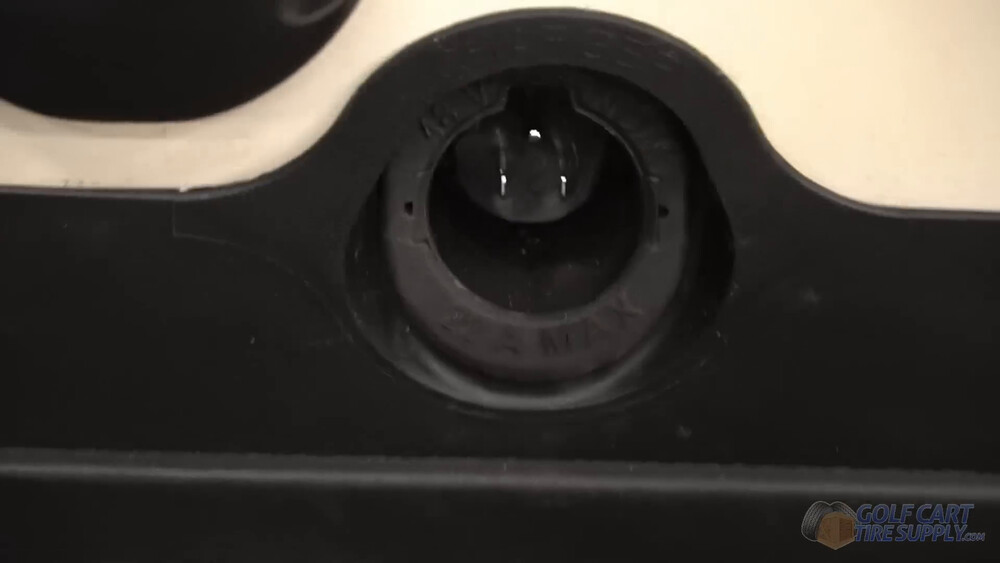
- Pop the plastic trim ring off the charge receptacle with a plastic trim tool. A screwdriver works too, just go easy so you don’t crack it.
- Pull up hard on one side of the kick panel, then the other, and slide it forward and out (this is a lot easier with two people).
- Back out the three screws holding the receptacle (two on top, one on the bottom) and pull it out along with all of its cables.
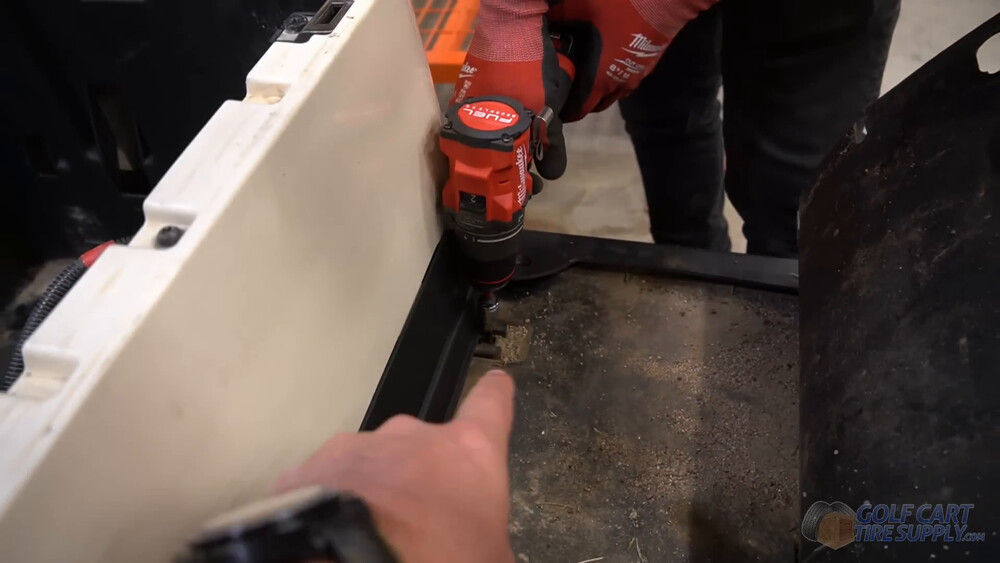

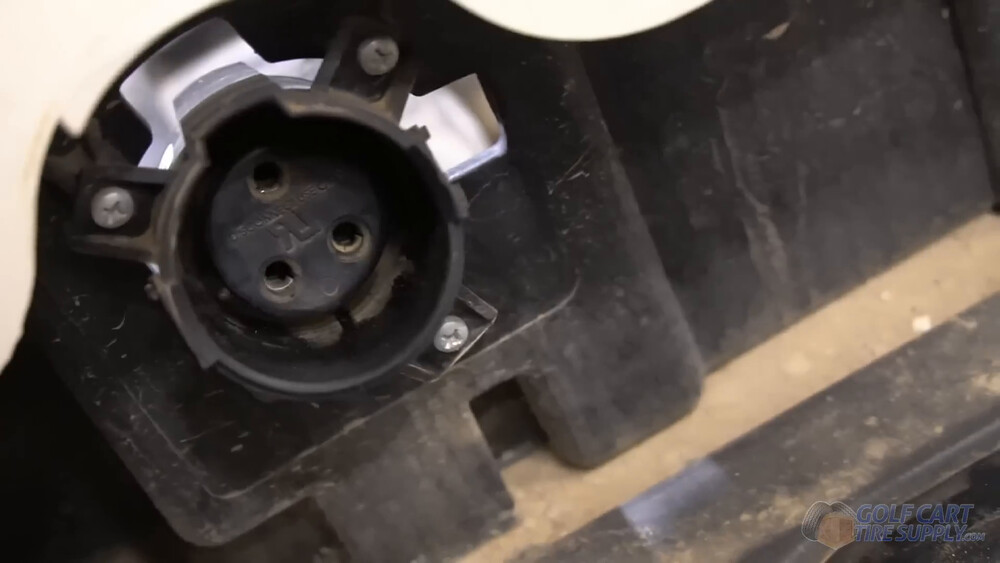
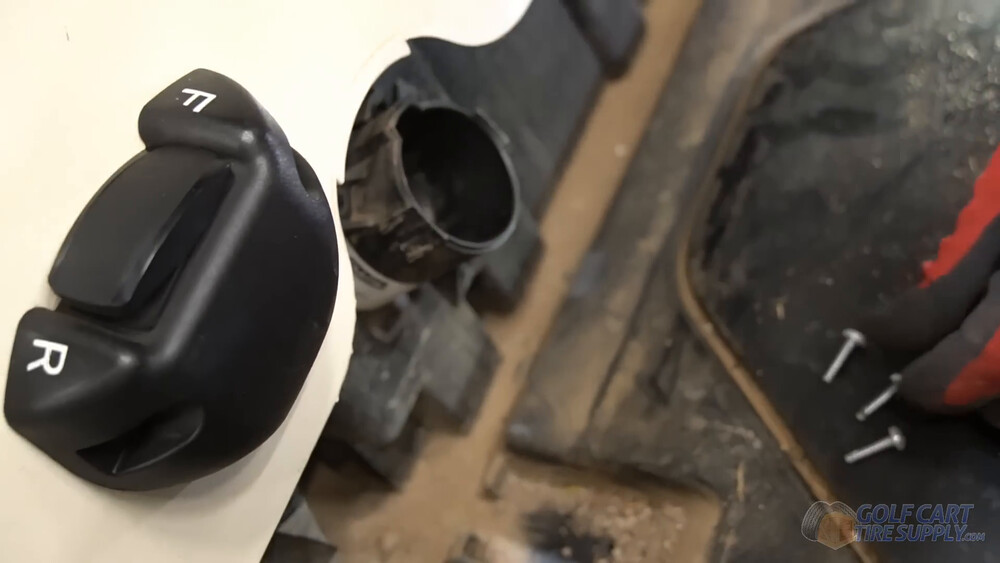
Save those three screws and the trim ring. You’re done with the old receptacle, but the screws and the ring go right back on with your new one.
Step 6: Install the New Charge Port
(Watch this step in our video at 18:26)
With the kick panel off now’s a great time to vacuum out all that dirt (how often do you get this area open, right?). Then feed your new 110V charge receptacle straight through the opening and line it up with the tabs. Secure it from behind with the three screws you saved, snug them down, and that’s it.
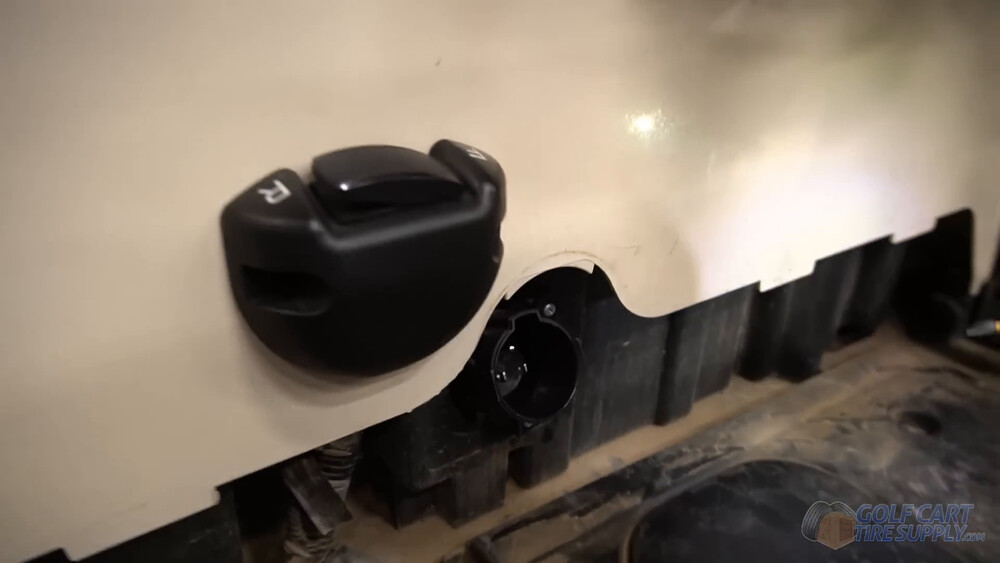
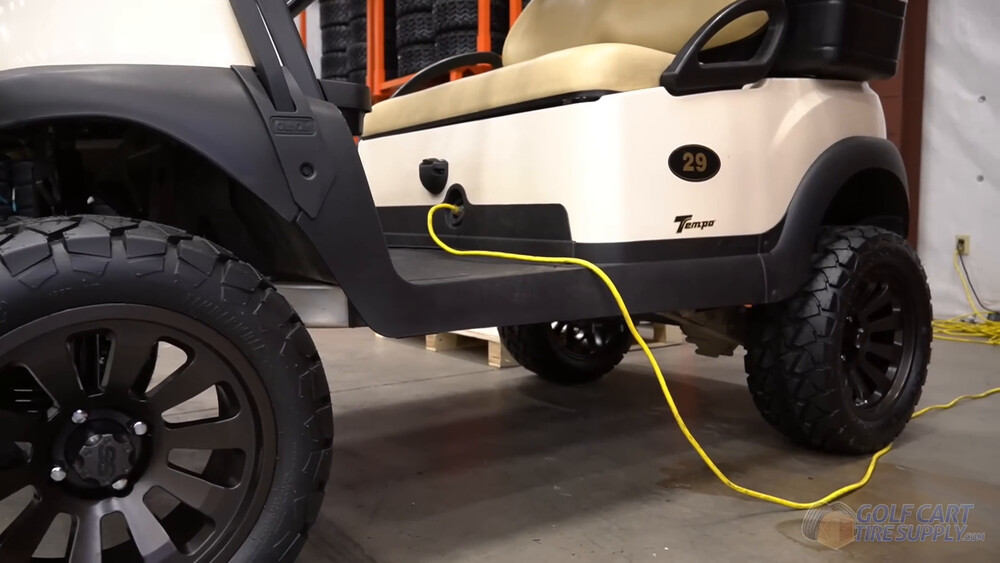
From now on, charging your Tempo is as easy as grabbing any extension cord in your garage and plugging it in right up front. And it looks super clean too.
Step 7: Install the Battery Support Brackets
(Watch this step in our video at 19:41)
If your cart had a nice flat battery tray, you could set the lithium battery right in and drive self-tapping screws straight down through its feet. But the Tempo isn’t that cart. Its battery tray is full of cutouts, and the main wiring harness runs through there too. So you’ll bolt the supplied brackets down to your tray first, then set the battery on top of them.
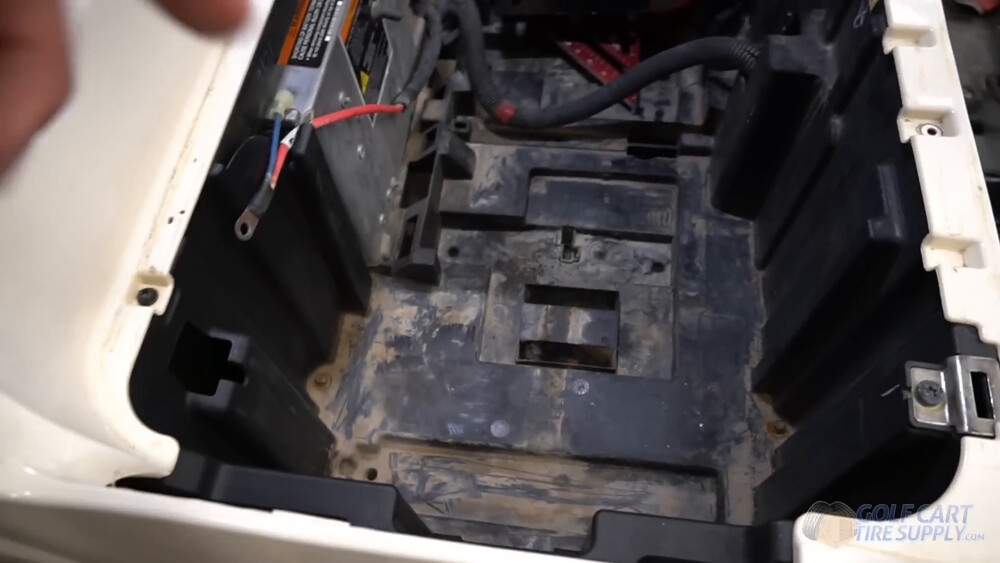
This part is easier than it sounds. Pick a flat, centered spot for your first bracket that still leaves room beside the battery for your charger. Measure how far apart the bolt holes are on the bracket and mark that spacing on a speed square. Then slide your washers up against the edge, so you know your holes will be square and in line. Drill two pilot holes, then open them up with a 5/16" bit.
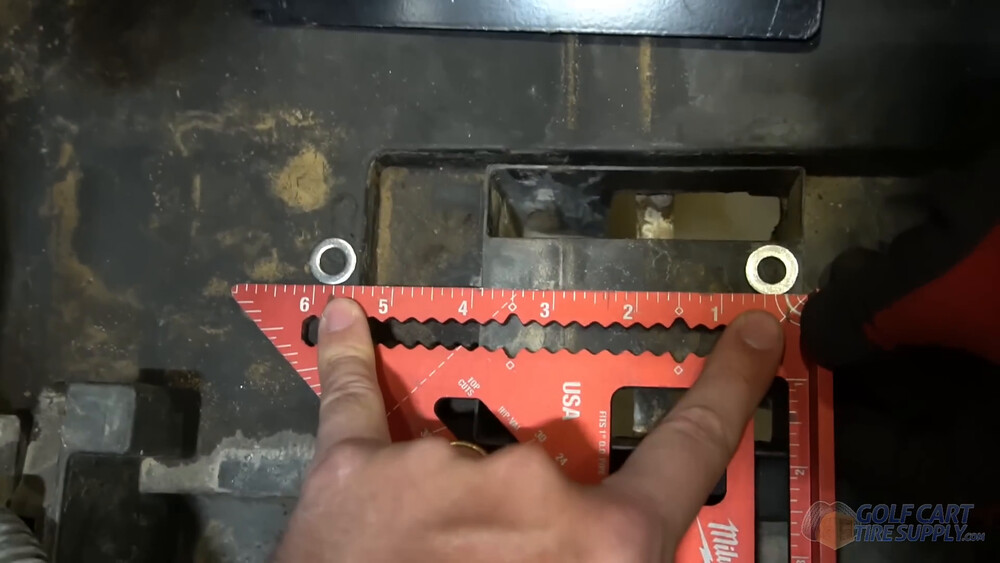
Push the 5/16" bolts down through the bracket with the big washers on top. Then reach under the tray to start the nuts, and snug everything down with a 1/2" socket.
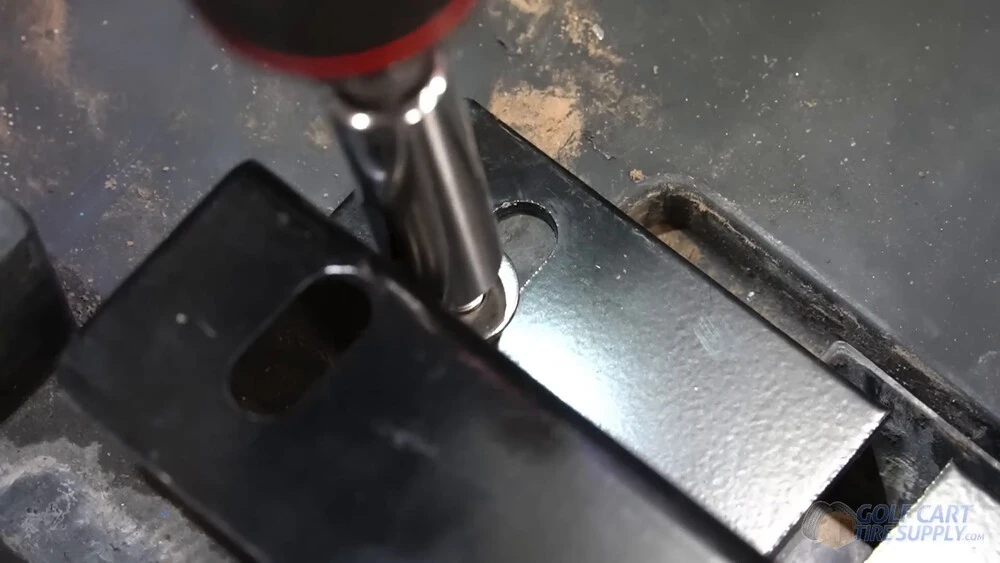
For your second bracket, measure the length of the battery across the top, then add the extra distance out to the foot so the battery lands right where you want it. Drill and bolt it down the same way. Measure twice here. You can always drill another hole, but nobody wants extra holes in the bottom of their Tempo.
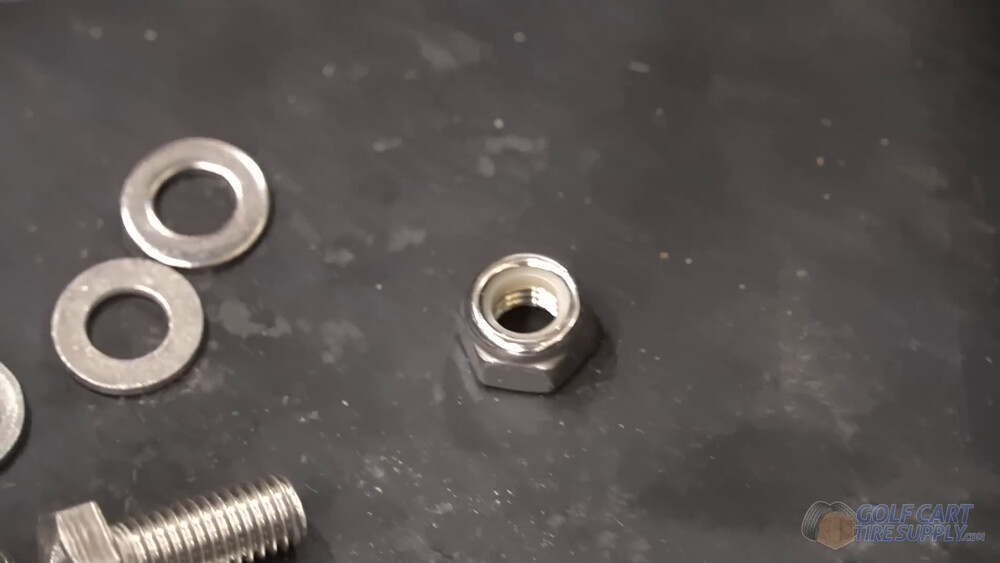
Could you get away with self-tappers on the brackets instead? Probably, for as long as you own the cart. But ALLIED includes nylon locking nuts for a reason, that little nylon ring keeps a 108-pound battery from vibrating its hardware loose over years of bumps. It’s the cleanest way to do this install.
Step 8: Place the new Lithium Battery in the Cart and Secure It
(Watch this step in our video at 25:35)
Before your battery goes in, tuck the main wiring loom (the one that runs to the front of your cart) under the bracket and snake it through. That keeps it riding under the battery nice and clean instead of getting pinched.
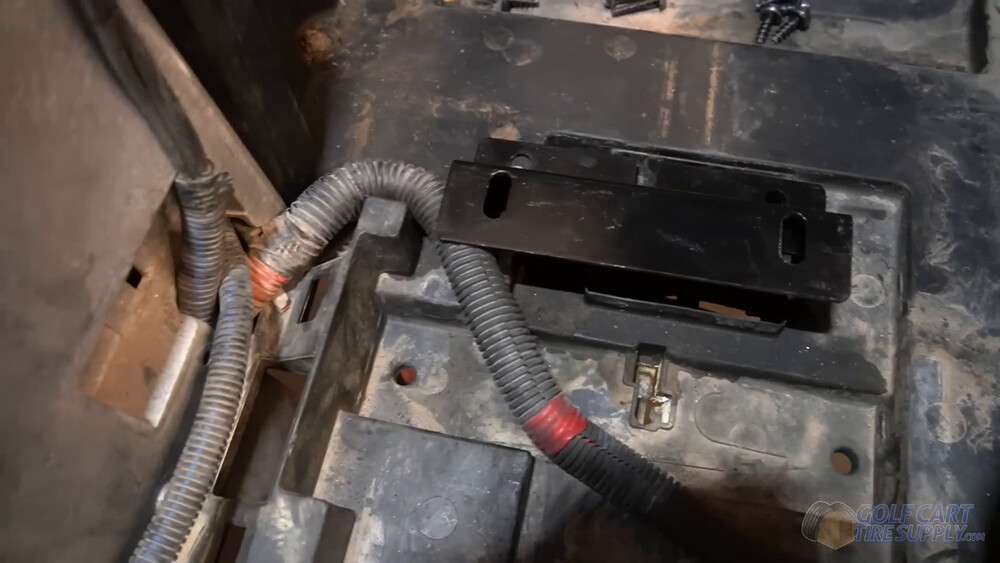
Now grab a helper and lower your battery in. At 108 pounds it’s a two-person job, but that’s a whole lot easier then lifting out six lead-acid batteries! Line the feet up over the bracket holes on both sides.
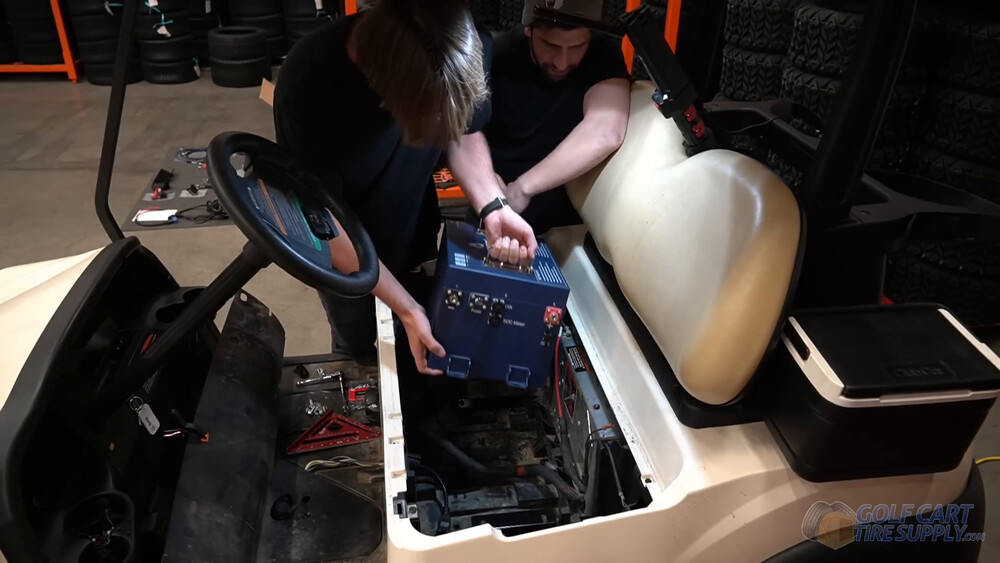
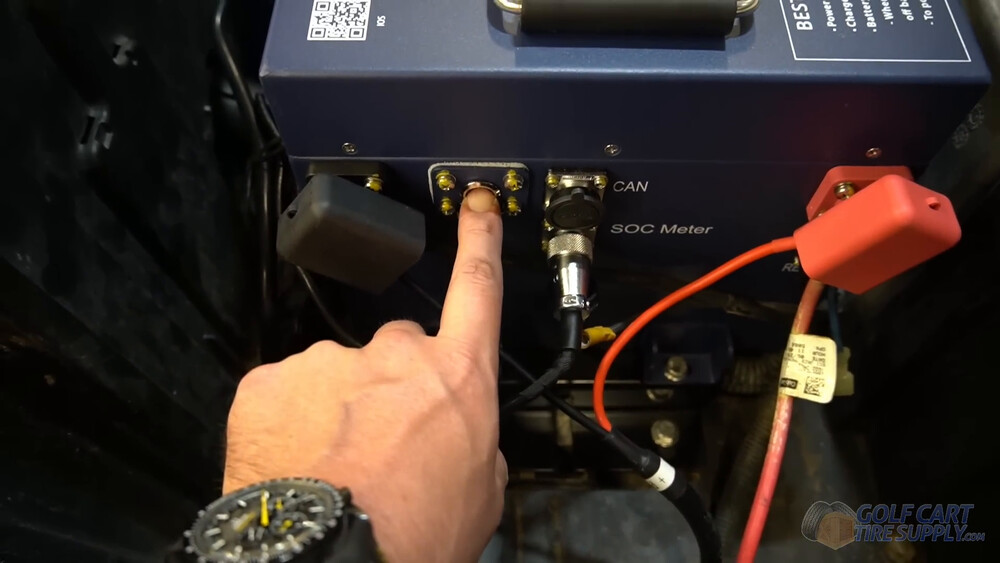
Watch your orientation. We set our battery with all of the important openings facing the driver’s side. That’s the CAN port, the SOC meter port, the power button and both terminals. Your main positive and main negative both come up on that side, so they’ll reach the terminals without any stretching. (That’s how the ALLIED pack fits in our Tempo. If you’re running a different brand, go with the orientation in your kit’s instructions.)
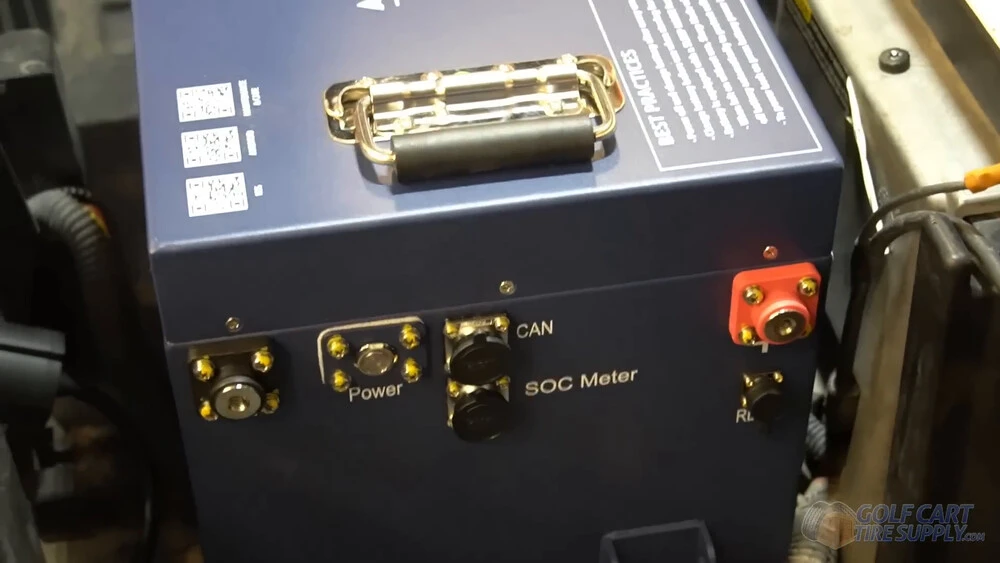
Bolt the feet down to the brackets with a socket on top and a fixed wrench holding the nut underneath, and get them good and tight.
Step 9: Install the On-Board Charger
(Watch this step in our video at 27:50)
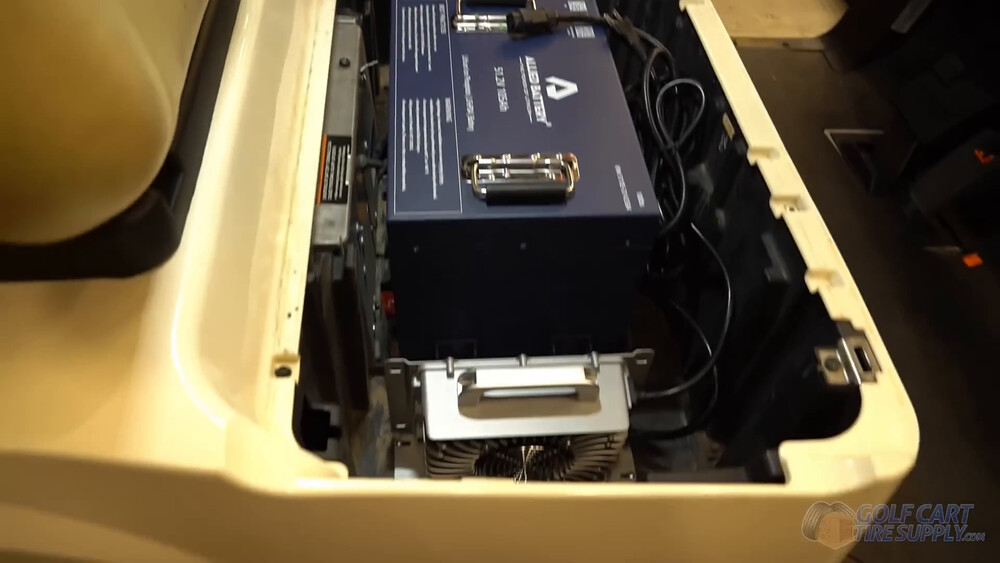
Your charger is easy to mount. It goes on the flat plastic right next to the passenger side of your battery, and since it weighs very little, it doesn’t need brackets. Four #10 self-tapping screws through it’s mounting tabs will hold it in place just fine.
Route the charger cables through the little valley in your tray to keep things tidy. Then plug the charger’s male plug into the female end on the back of your new charge port.
Step 10: Place the Power Cable in the Battery Tray
(Watch this step in our video at 29:05)
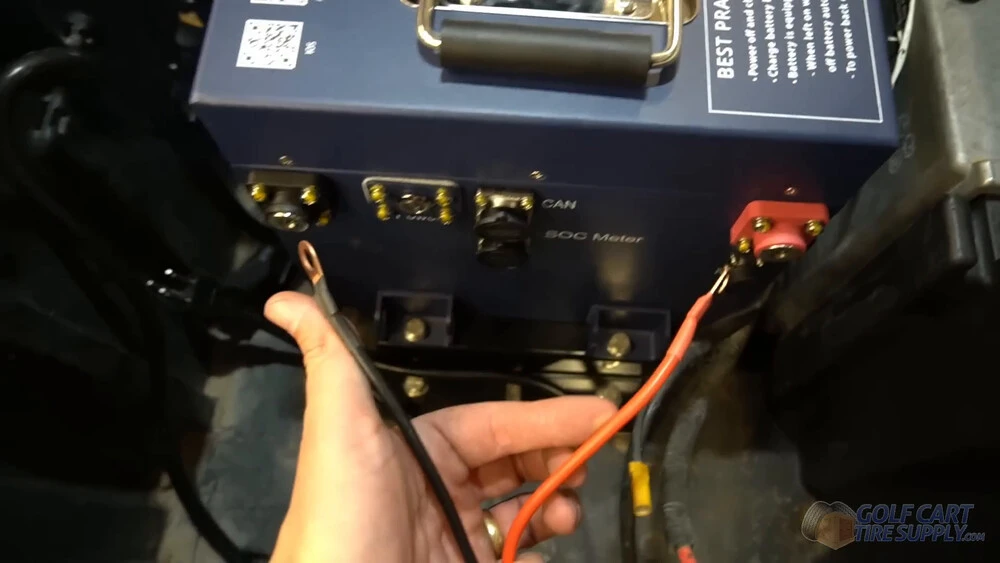
The charger’s other cable is the one that actually feeds your battery. Screw it together with the power cable that came in your kit (it’s the connector with the blue end) and now you’ve got a new red positive lead and black negative lead for your battery.
Lay those new leads right alongside your main positive and main negative (reds with reds, blacks with blacks), and leave some slack at every connection in case you ever need to unplug something later. P-clips and a couple of self-tappers will keep your wiring neat, but they’re totally optional. Loose cables in there are just fine.
Step 11: Install the State-of-Charge Gauge
(Watch this step in our video at 30:24)
Last big piece! Your state-of-charge (SOC) meter is the fuel gauge for your new battery, and it goes up on your dash where you’ll actually see it. Plug the long black SOC cable (the one with a silver connector that looks like a microphone plug) into the SOC Meter port on your battery.
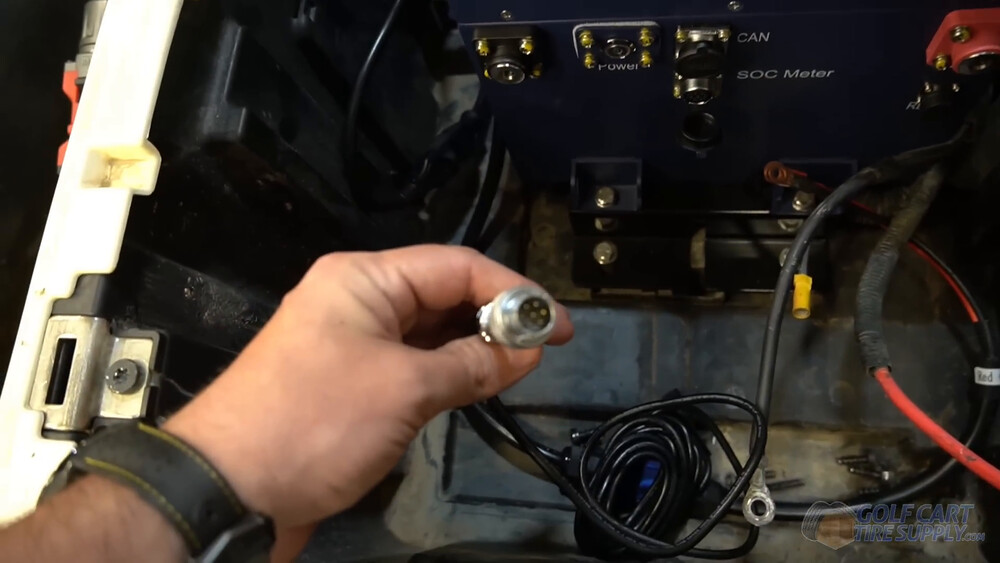
Run the cable out through the kick panel area and down the empty channel under your floor mat. Then bring it up behind the dash. Pulling your floor mat out completely makes this a lot easier (and gives you one more shot with the shop vac).
To get behind the dash, take off your center dash panel. It’s held on by two T27 screws (one on each side) plus one small T15 screw on top in the middle.
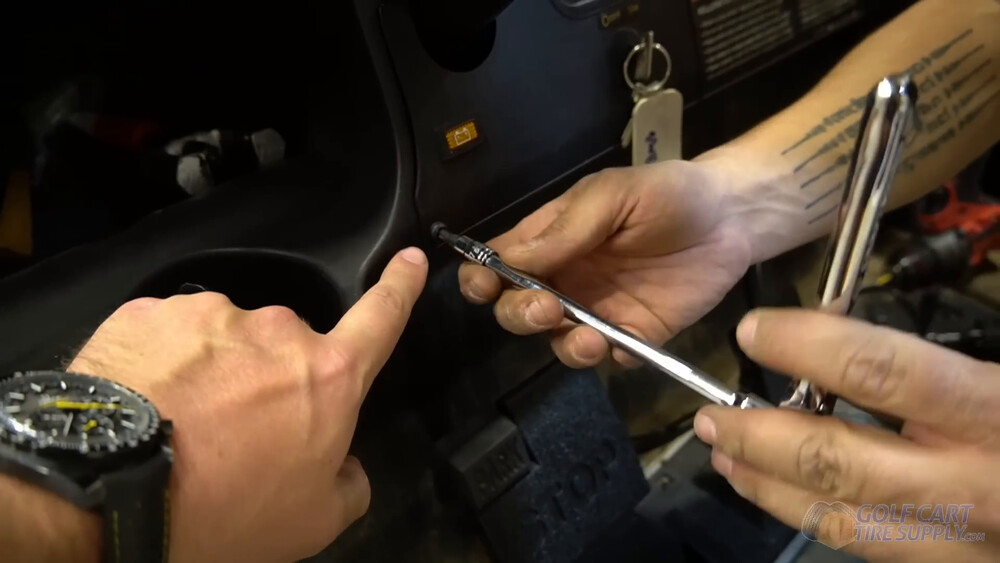
Before you drill, reach up behind the spot you picked and make sure there’s room back there for the gauge and its bracket. Then cut your hole with a 2" hole saw. We picked our spot by eye, somewhere flat that’s easy to read from the driver’s seat.

Feed the SOC cable up through the hole and plug it into the back of the gauge. Set the gauge in and slide the bracket over the two little studs on the back. Then run the nuts down.
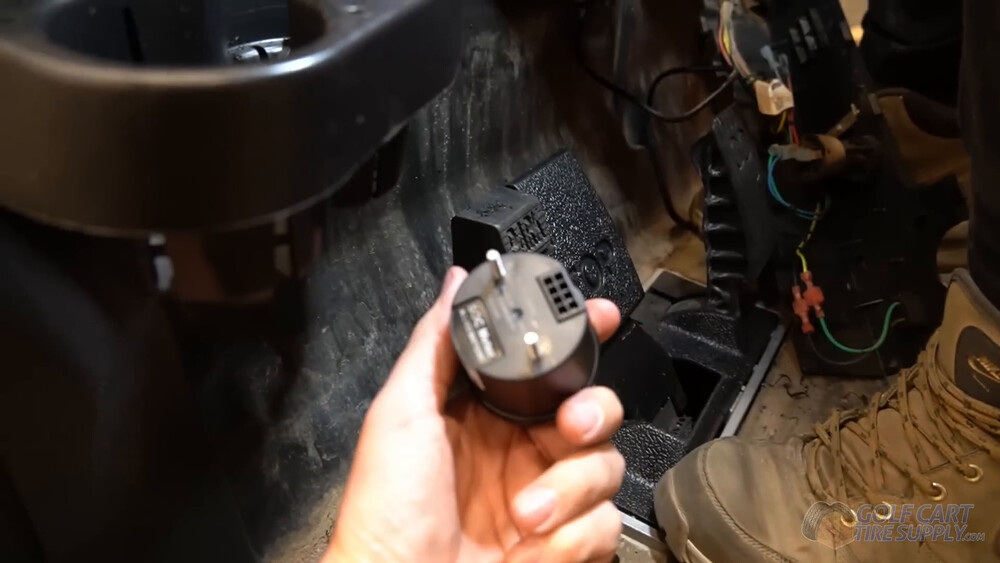
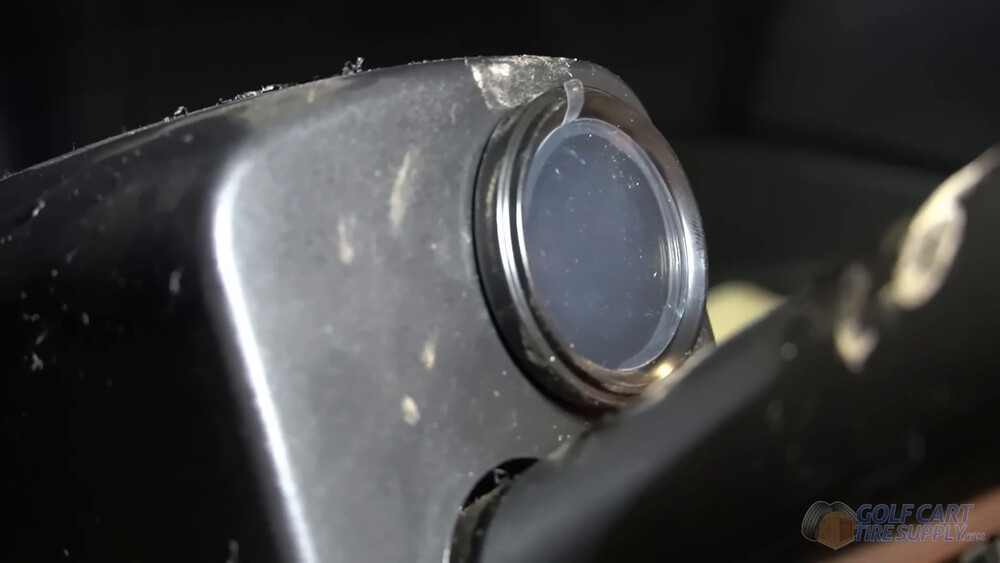
Rather not drill a hole in your dash? You can order a bracket and mount the gauge on your steering column instead. Either way, tuck the extra wire up under the dash and put the panel back on (T15 first). Then pull any leftover slack back through the kick panel area.
Got one of the newest Tempos? Club Car announced a redesigned dash for the Tempo in 2025 (on the lithium, lead-acid and gas models), so your gauge spot will look a little different from ours. Same idea though, find a flat spot with room behind it.
Step 12: Begin Reassembly
(Watch this step in our video at 35:17)
Now let’s put your cart back together. Start with your floor mat, tucking the front edge in first and then the sides. Keep half of it folded back and clipped to the pedal though, because you’ll need that room to get the kick panel back on.
Set the kick panel in place. There’s three T40 bolts along the bottom, so run those back in first. Then snap the top plastic piece back into place. This little panel is one of the hardest parts of the whole install, so be patient and don’t break the fins. Once it’s lined up, give it a firm smack with the heel of your hand to seat it.
Pop the trim ring back onto your new charge receptacle and lay your floor mat down flat. Then put the two T30 screws back in on top and reinstall your side panels.
Step 13: Hook Up the New Lithium Battery Cables
(Watch this step in our video at 37:58)
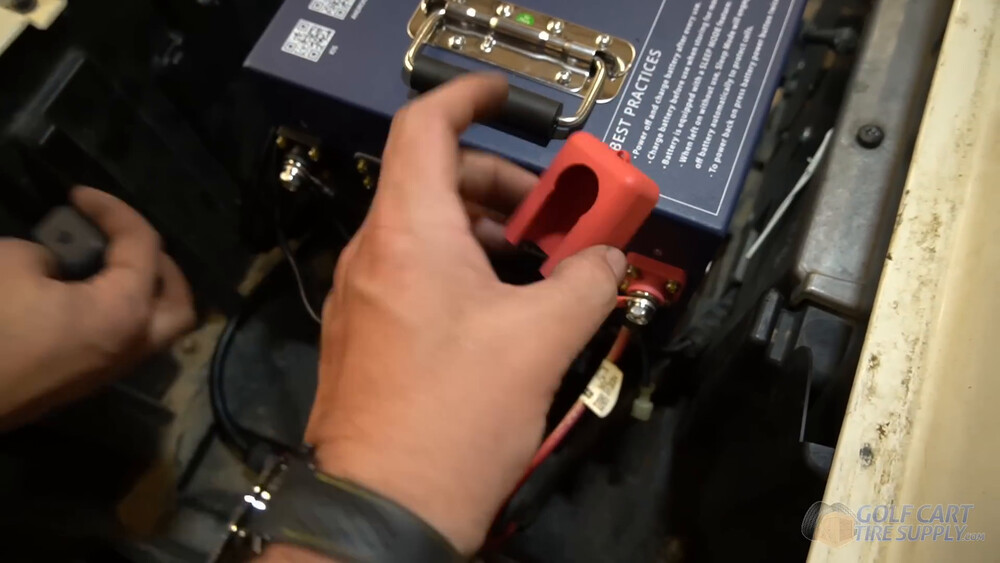
Almost done! Grab the terminal hardware out of your kit and stack your cables in this order.
- Negative terminal gets your main negative first, then the negative cable from the charger goes on top of it
- Positive terminal gets your main positive first, with the charging cable on top
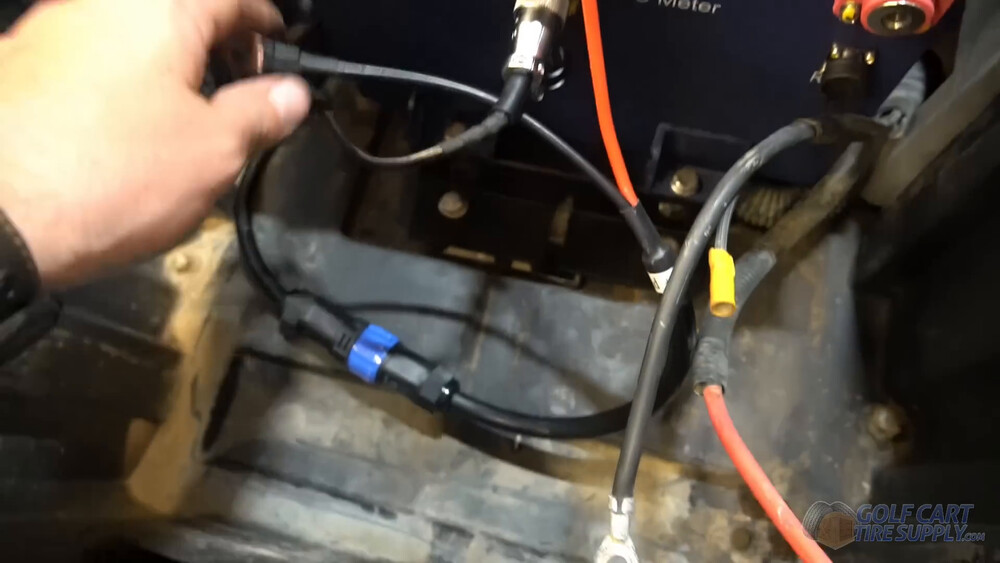
Run the hardware through both cables on each terminal and tighten it down. Then clip on the terminal covers that came in your kit, angled so they follow the direction of your cables.
Step 14: Power On the Battery System
(Watch this step in our video at 38:47)
Now for the fun part! Flip your Run/Tow switch back into RUN, then press and hold the power button on your battery until the light comes on. Your SOC gauge up on the dash should wake up right along with it.
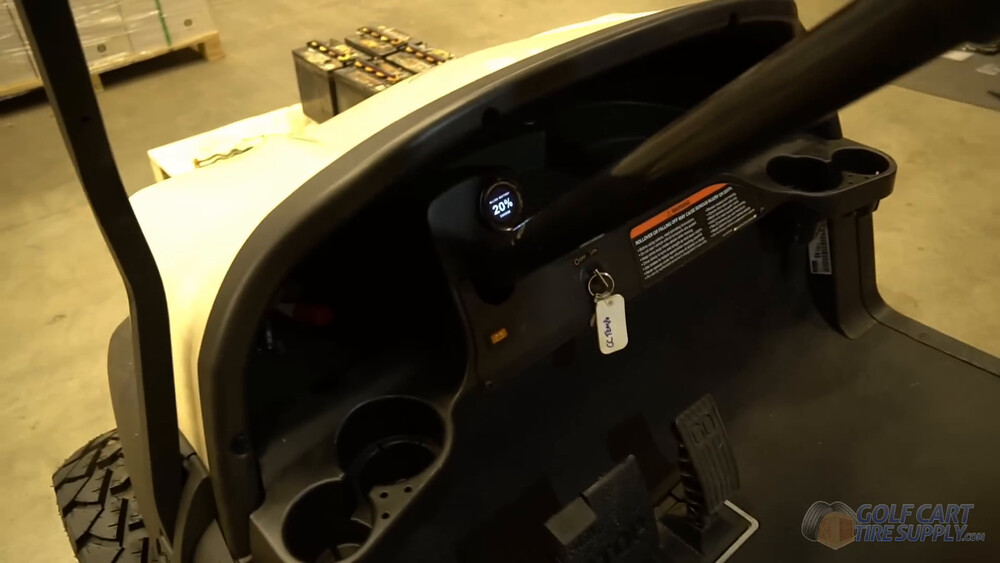
Don’t be surprised if it reads low, new lithium batteries usually show up at around 50% charge or less (no matter which brand you buy), so plug your Tempo in and charge it all the way up before your first real drive. While it charges, download the ALLIED app and pair it with your battery over Bluetooth. Then turn your key on and put it in forward. Go enjoy the ride!
All Done! Your Club Car Tempo Runs on Lithium Now
That’s the whole Club Car Tempo lithium conversion, start to finish! You pulled 350 pounds of lead out of your cart and swapped it for one 108-pound battery. You also got a gauge that tells you exactly how much juice you have left at any time, and a charge port that takes any extension cord in your garage. No more watering, and no more wondering if your cart will make it back up the hill. You'll also feel more torque and just enjoy driving you cart more than you ever have (we're sure of it)!

It really does take about an afternoon and your Tempo is going to feel like a whole new cart. So the next time somebody at the course complains that their Tempo is dying halfway through the back nine... you’ll know exactly where to send them!
Adding 12V Accessories? How to Install a Voltage Reducer
How do I install a 48V to 12V voltage reducer on my Club Car Tempo after a lithium conversion?
A lot of Tempos run 12-volt gear like headlights, a horn, USB ports or a sound bar. Your new lithium setup is one big 48-volt battery with no 12-volt tap anywhere on it, so you’ll need a 48V to 12V voltage reducer in between. Hook your 12-volt accessories straight up to a 48-volt battery and you’ll fry them (ALLIED’s own FAQ warns against it too).
Did your Tempo already have lights? Take a look at how they were wired. On a lot of older 8-volt Club Cars, the lights ran off a tap partway down the battery pack through a small reducer. If yours is set up that way, that tap goes away with your old batteries and the old reducer can’t take 48 volts. So your new reducer takes over that job.
For parts, you’ll need a reducer rated for the accessories you’re running. The ALLIED 36V / 48V reducer we sell is rated for 30 amps and comes with ring terminals made for ALLIED batteries, plus two butt connectors. You’ll also want wire strippers, a crimper and a few zip ties. Then work through it in this order.
1. Mount the reducer. Pick a dry spot in your battery bay where its leads can reach the battery terminals, and fasten it down with a couple of self-tapping screws.
2. Hook the input leads up to your battery. Reducer positive goes to battery positive and reducer negative goes to battery negative, stacked on top of the cables you hooked up in Step 13. Clip your terminal covers back on when you’re done.
3. Connect the key-on wire (if your reducer has one). A lot of reducers are key-switch activated (the ECO Battery and RHOX reducers we carry both are), which means they have a small lead that only wakes them up when the key is on. On a Club Car it connects to the dark blue key-on wire on the back of your key switch, which sits right behind the center dash panel you already pulled in Step 11. Per Club Car’s service manual, that blue wire only carries power with the key ON, so your accessories shut off with the key instead of slowly draining your battery.
4. Wire the 12V output to your accessories. Butt-connect the reducer’s 12-volt output to your accessory wiring (positive to positive, negative to negative). Crimp them tight and zip-tie the wires away from anything that moves.
5. Test it. With the key off, your lights should stay off. Turn the key on and they should light right up. If they don’t, check your ground connections first.
Wire colors change from one reducer brand to the next, so keep the diagram from your reducer’s box handy and trust it over any wire color you read online. And if your reducer doesn’t have a key-on lead, it stays live any time your battery is powered on.
Club Car Tempo Lithium Conversion FAQ
How do I know if my Club Car Tempo is lead-acid or factory lithium?
Lift your cart’s seat. If you see 6 x 8-volt batteries (usually with a watering line across the tops), your Tempo is lead-acid and this conversion guide is the one you want. If you see one big factory lithium pack, you have a lithium Tempo and you’ll need a factory replacement kit like our BOLT Energy Club Car Tempo replacement kit instead. Not sure what year your cart is? Our Club Car serial number lookup can help.
Does a Club Car Tempo need an OBC bypass for a lithium conversion?
No, and that’s good news! Lead-acid Tempos charge through Club Car’s ERIC system, which doesn’t use an onboard computer (OBC), so there’s nothing to bypass.
Can I keep using my Tempo’s old charger with a lithium battery?
Nope. Your factory charger was made for lead-acid batteries, and your lithium kit comes with a charger matched to your new battery. ALLIED’s warranty also requires an ALLIED lithium charger, so let your old charger retire right along with your old batteries.
Will my Tempo still stop me from driving away while it’s plugged in?
Not after this conversion. The blue interlock wire that kept your cart from driving while the factory charger was plugged in comes out with the old receptacle loom in Step 5. So make unplugging your extension cord part of your routine before you drive.
What do I do with the single point watering system?
Pull it out along with your old batteries. Lithium batteries never need water, so there’s nothing left for it to do.
How much range will I get from a 105Ah lithium kit?
Plan on about 30 to 45 miles per charge. Where you land depends on your terrain, your tires, how many people you’re hauling, if your Tempo is lifted, and how heavy your right foot is. For a closer number on your own cart, try our Lithium Golf Cart Battery Range Calculator.
How long does a Club Car Tempo lithium conversion take?
About an afternoon. Taking out the charge port and the kick panel eats up the most time, so if this is your first conversion, give yourself the whole afternoon and don’t rush your brackets.
Need Help? We’ve got your back!
Got questions about your Club Car Tempo lithium conversion, or not sure which kit is right for your cart? Give our Golf Cart Expert team a call at 1-844-422-7884. We sell and support a whole lot of lithium golf cart batteries and conversion kits. And if your Tempo needs anything else while the seat is up, we carry plenty of Club Car Tempo parts too!